E60 M5 Header Install
The installation of Supersprint headers on an E60 M5 was one of the more physically challenging projects to come through the shop in a long time.
If you’ve ever looked under the hood of a modern M5, you've probably noticed that the engine compartment is filled with V10 engine with nary a gap between it and anything else. As beautiful and organized as it is, it is not a friendly place for aftermarket go-fast parts. Looking over the detailed 10 page instruction booklet that came with the headers we were a bit worried that this project was going to be massively time consuming (and costly) for the customer.
(pictures and video after jump)
First order of business was to figure how much of what the instructions said was really required in order to swap the OEM headers with the new ones. There is always more than one way to work on a car; and if you’ve worked on enough of them you come up with practices that save some time.
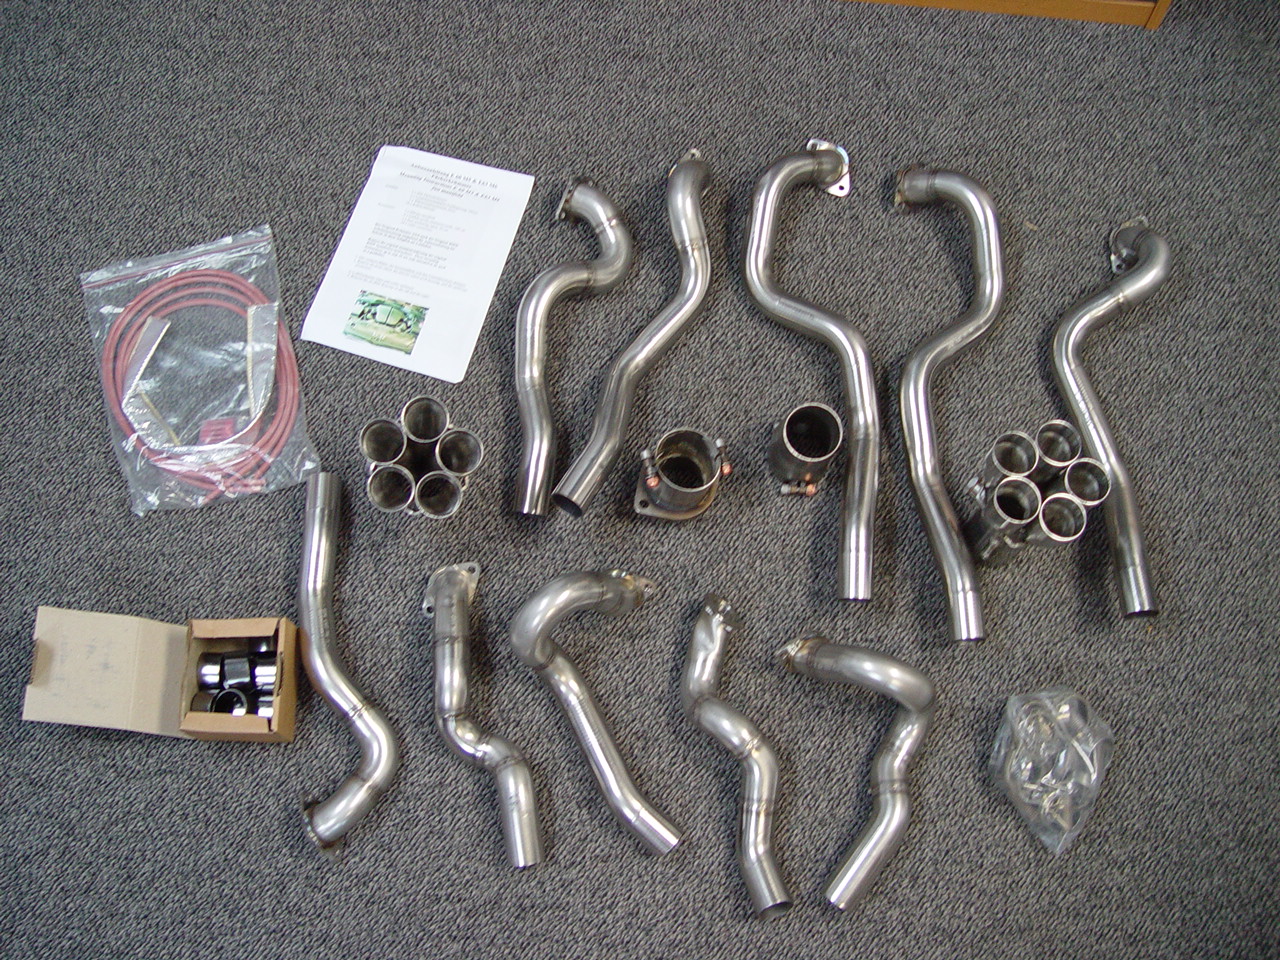
All the pieces
One such time saver was not messing with the A/C hard lines (which would have required evacuating the refrigerant). Also, we did not see the need to hook up the engine hoist and drop the front sub-frame.
On the top we removed the air boxes, various hoses and lines, as well as the exhaust return check valves. We removed the splash shields and belly pans from the bottom. This pretty much opened up access to the heat shields surrounding the headers. To get rid of the heat shields required removing the twin oil pumps from either side of the oil pan and the steering shaft on the driver’s side. With all these items out of the way we could finally see the stock headers.
Getting to and then loosening and taking off the header nuts was the single most frustrating part of the project. Many of the nuts were hard to see, hard to reach, and just plain hard to deal with. I swear we worked on removing one particularly hard to reach nut for about an hour. We did not have the room to get one click out of the ratcheting wrench. Of course this issue would haunt us again when it came time to put the new headers on.
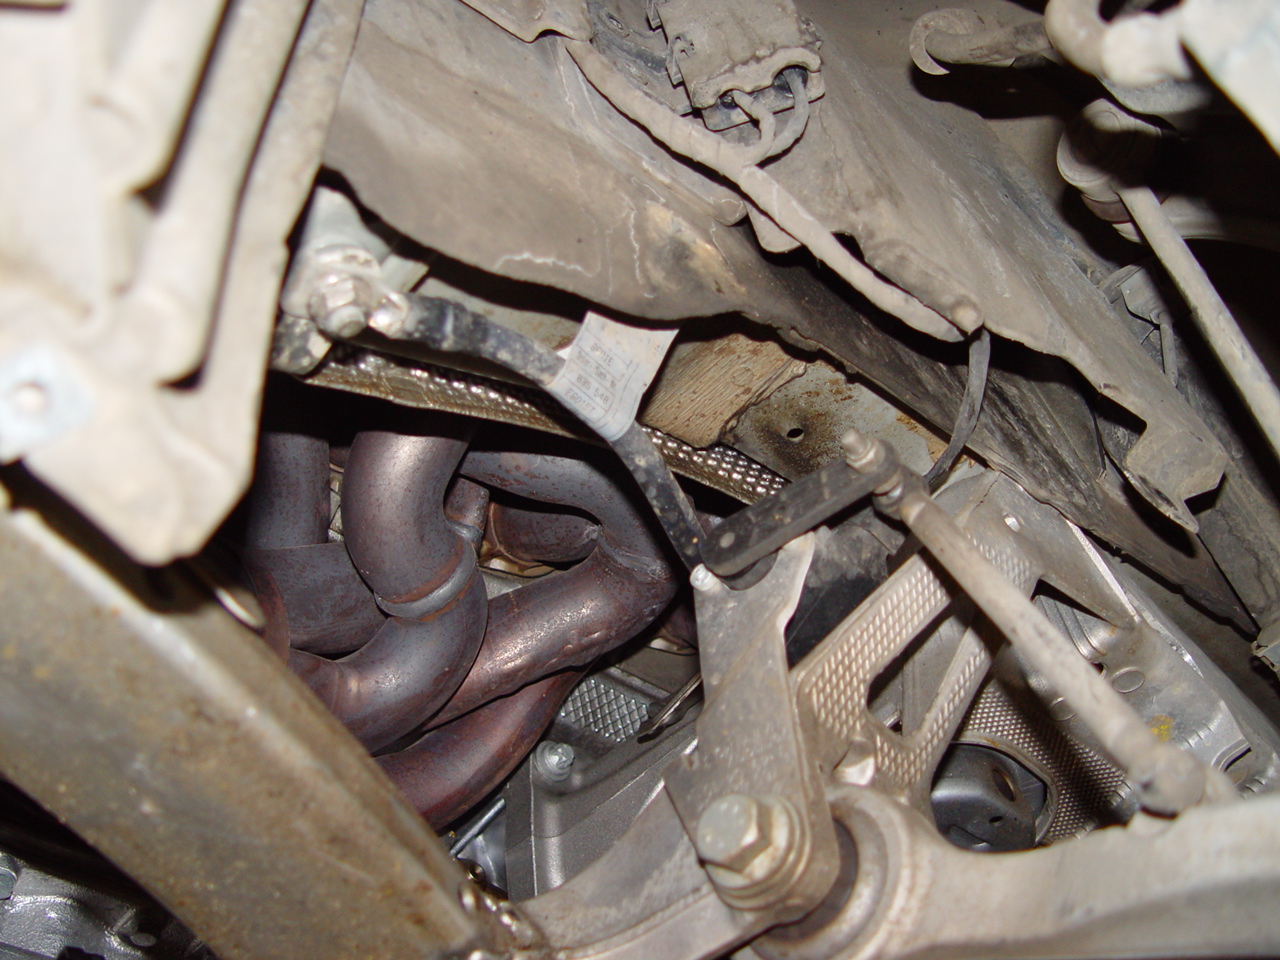
Tight quarters
The individual Supersprint header tubes are installed separately, and then inserted into a collector downstream. This made installing the new headers just a little bit easier.
The US spec M5 comes with two sets of catalytic converters, the primary ones that are attached to the stock headers, and a second set further back. The Supersprint kit (actually designed and manufactured by Hamann Germany) eliminates the primary cats. In order not to mess up the emissions programming, the pre and post cat O2 sensors need to be moved from their original position by the primary cats to the secondary cats. This required us to splice in some extra length in the sensor cables and to weld new ports-- or bungs-- after the secondary cats for the post cat O2 sensor. We also had to cut into the drivetrain tunnel heat shielding to make room for the sensors in their new position.
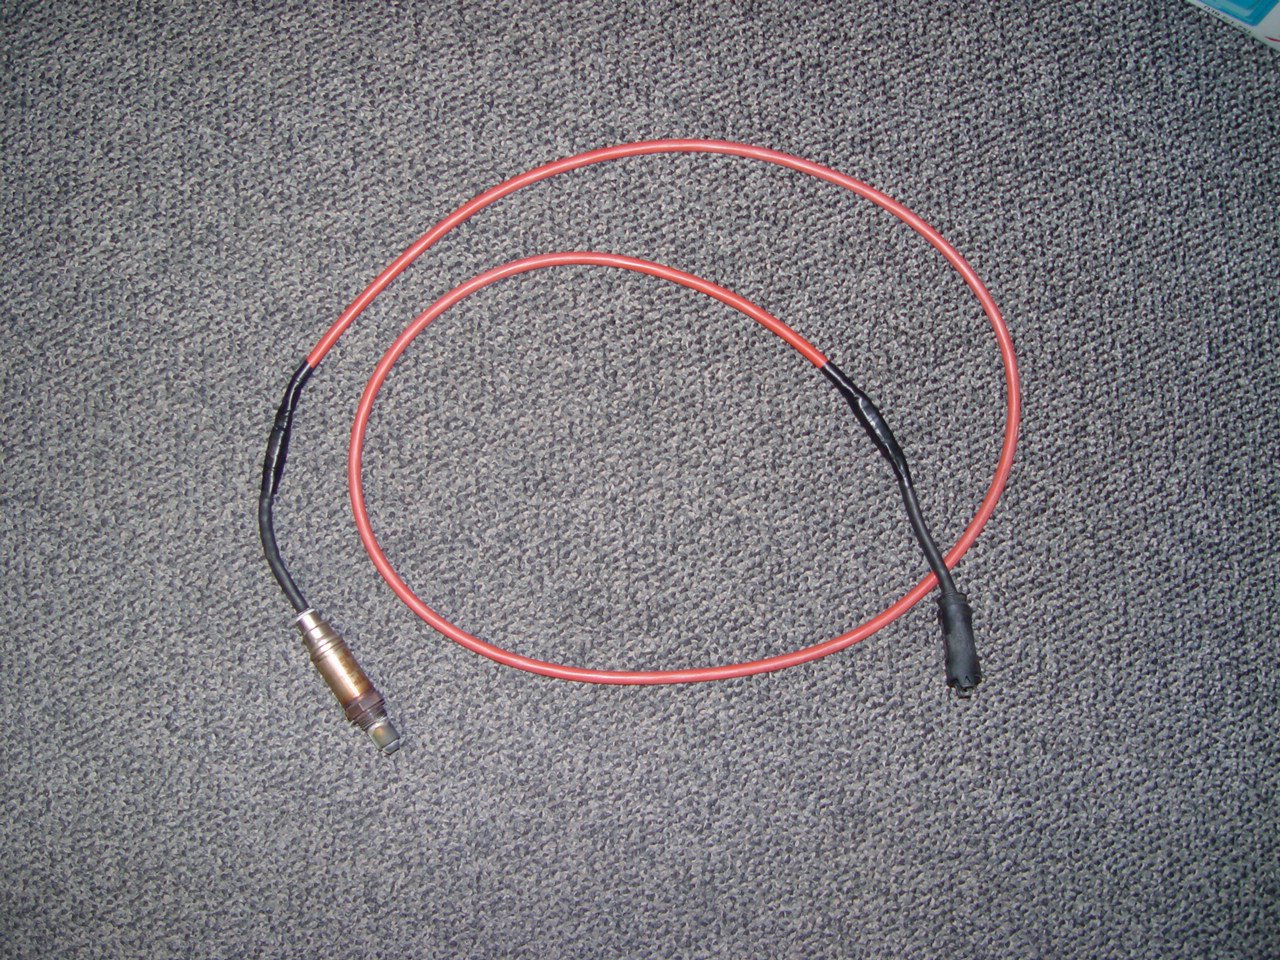
O2 wires spliced

New O2 bungs welded onto exisiting secondary cats
After the header tubes are installed, the ends needed to be inserted into the collector—which harnesses the separate tubes and combines them into one exhaust pipe (per side). Each collector is comprised of 5 individual gaskets, 5 spacer rings, clamping plate and springs. The pre-cat O2 sensor port is also part of the assembly. It took a bit of massaging to get all of the individual tubes lined up properly to fit into the collector.
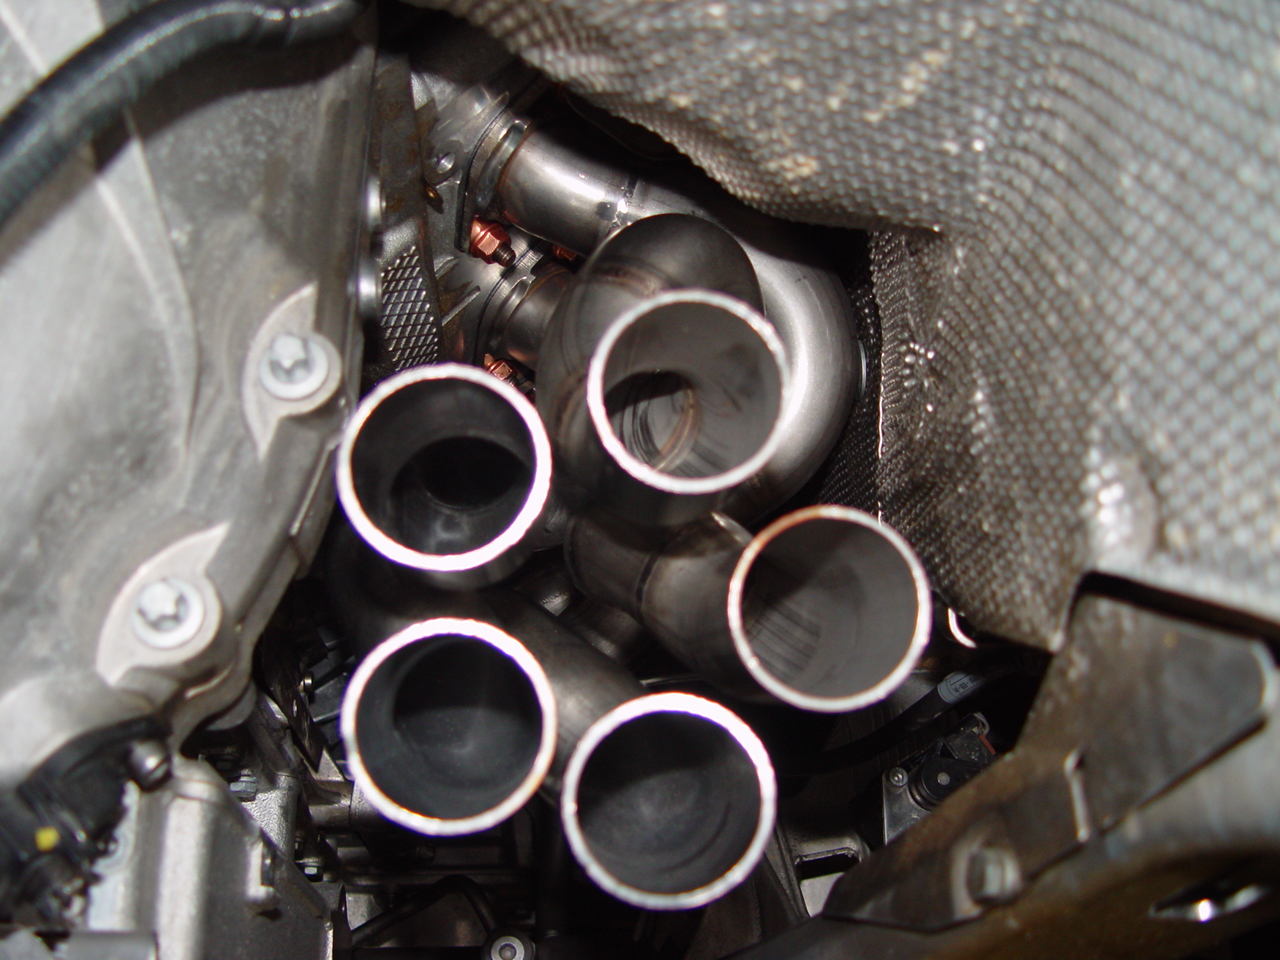
An end view of the individual header tubes
The customer decided to stick with the stock secondary cats, so we had to use a special coupler to attach the collectors to the stock pipes. After all the pipes were connected, we went back and tightened the nuts and bolts to the proper torque. This is a step that is very important in any exhaust install—first hang all the pieces loosely, and then go back and snug all the fasteners. If you don’t this properly, chances are that even pressure will not be on the joint gaskets and leaking will occur. It’s also a good idea to double check everything after the exhaust system has heat cycled a few times.
Thanks to the geometry of the new headers, some heat shields required bending and cutting. Because putting these shields back on is such a chore, we’ve heard many folks skip this step and leave some of the shields off. The heat generated by the engine and its exhaust makes the risk too high not to put all the shields back on. It’s a necessary step in our opinion.
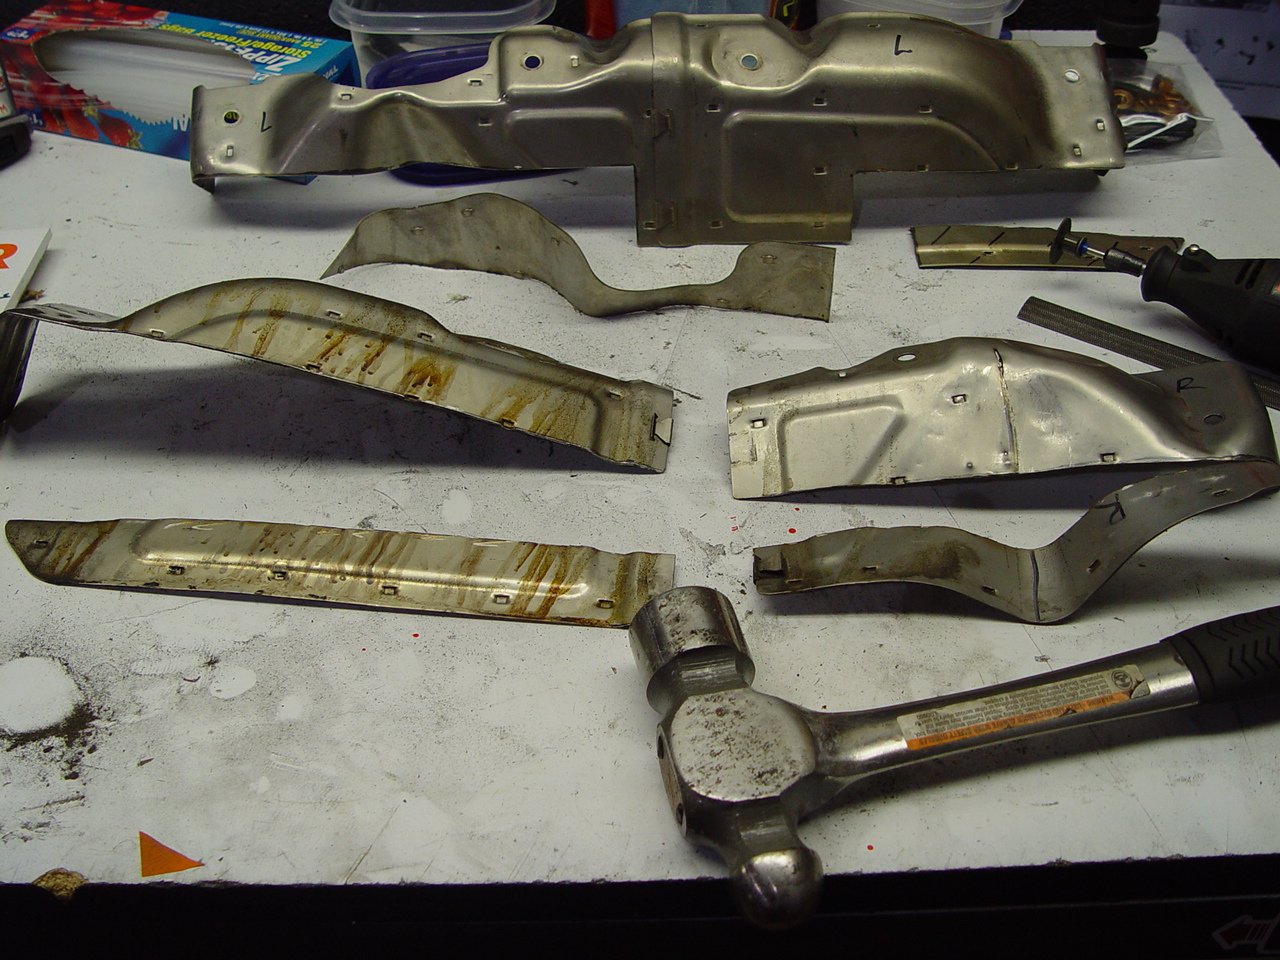
Heat shield re-work
Re-assembly of the components removed in order to access the headers was straight forward, if a little time consuming. When it was all said and done, the project took over 30 hours to complete. As is always the case, you learn time saving tricks every time you do a job like this and the labor hours will drop substantially on future installs.
So how does it sound? This particular car has Supersprint sport mufflers, so the sound is already tuned to begin with. Combined with the better flowing headers and elimination of the first set of cats, the result is quite a bit throatier than stock. Quiet at idle and cruising, deep wail when stepping on it.
More importantly, coupled with a re-flashed ECU, high end power was increased enough to be noticed by the customer. In day to day driving there’s little difference, but when driving at anything above eight-tenth the better breathing could be felt.

Video of owner taking deliver of M5 with Supersprint headers, stock mid-pipe and secondary cats, Supersprint sport mufflers.