« February 2013 | Main

February 25, 2014

Project Maximus Part 4

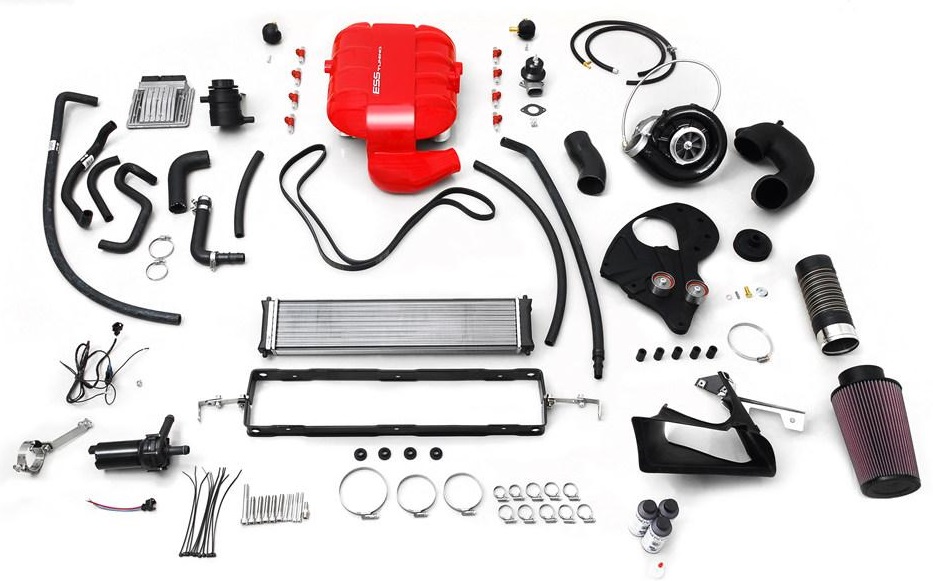
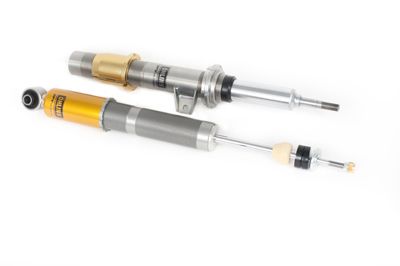
Since the 2008 BMW M3 of Project Maximus fame will be getting a 211 boost in horsepower it follows that a boost in stopping power is needed. We chose AP Racing's brand new Radi-CAL™ big brake system designed by STILLEN to clamp down the speed generated by the ESS Supercharger under the hood and the Ohlins Road and Track coil-over suspension at the four corners.

photo 47.jpg

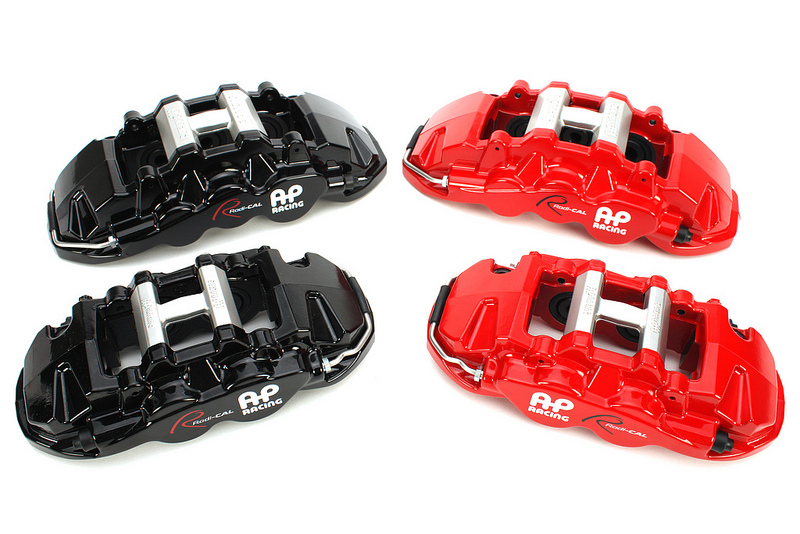
Not as widely known as Brembo, or even StopTech, AP Racing is a leading manufacturer of performance braking and clutch systems, for road and especially race use. We were able to check out their new range of Radi-CAL™ forged brake calipers--which incorporate quite a bit of race technology-- last fall at SEMA.

The forging process they use results in a strong, stiff two-piece caliper that is 20% lighter than similar cast calipers. This not only lowers a vehicle’s un-sprung weight compared to standard big brake kits, but also ensures continued high performance in demanding applications. The engineers at the show claimed the caliper design had been tested with over 500,000 cycles of pressure and torque. The non-symmetric design is the result of finite element analysis testing that determined where weight saving could be achieved without compromising strength and stiffness.

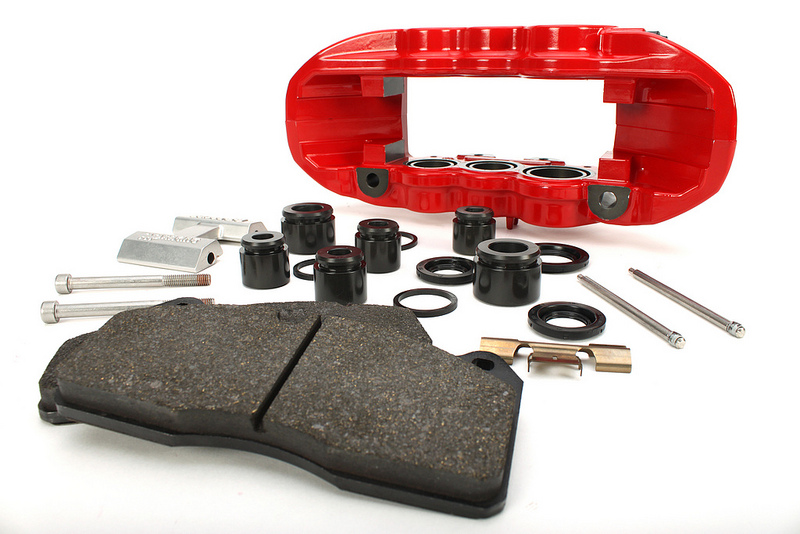
Radi-CAL calipers are double sealed for durability. Hard anodized aluminum pistons are differentially sized to maximize pad life. And a removable forged bridge allows for easy pad changes. Anti-rattle springs prevent pad movement and knock back.

The kit included floating two-piece disc assemblies (we chose the "j-hook" slotted design rotor over the weaker, in our opinion, cross-drilled style), and custom fitted aluminum mounting brackets, standard bolts and steel braided brake lines.

In preparation-- and to make the installation of the Ohlins suspension that much easier-- we already had the OEM brake system off the car-- lines, calipers, brackets, rotors and dust shield.

photo 32.jpg

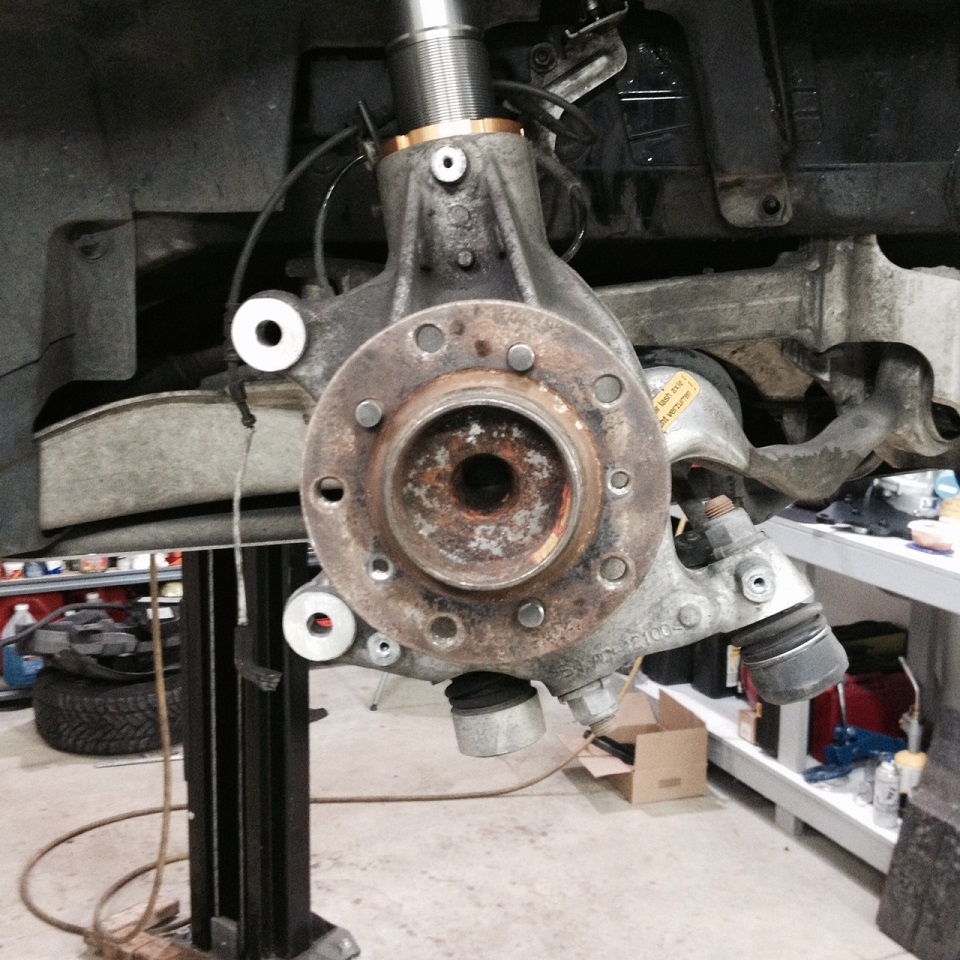
After cleaning up the wheel bearing and suspension mounting points we did a quick test fit. Because the AP Racing brakes are larger than stock in every way, it was clear we'd have to trim the OEM dust shield. We did debate leaving the front dust shield off altogether. But because the M3 will still be driven regularly on public roads, keeping grit and pebbles from lodging themselves behind the rotor is a good thing. Also, the shield acts as a heat barrier between the rotor and the suspension, specifically the rubber end link bushings and the fluid in the nice new Ohlins dampers. So we trimmed to fit.

photo 20.JPG

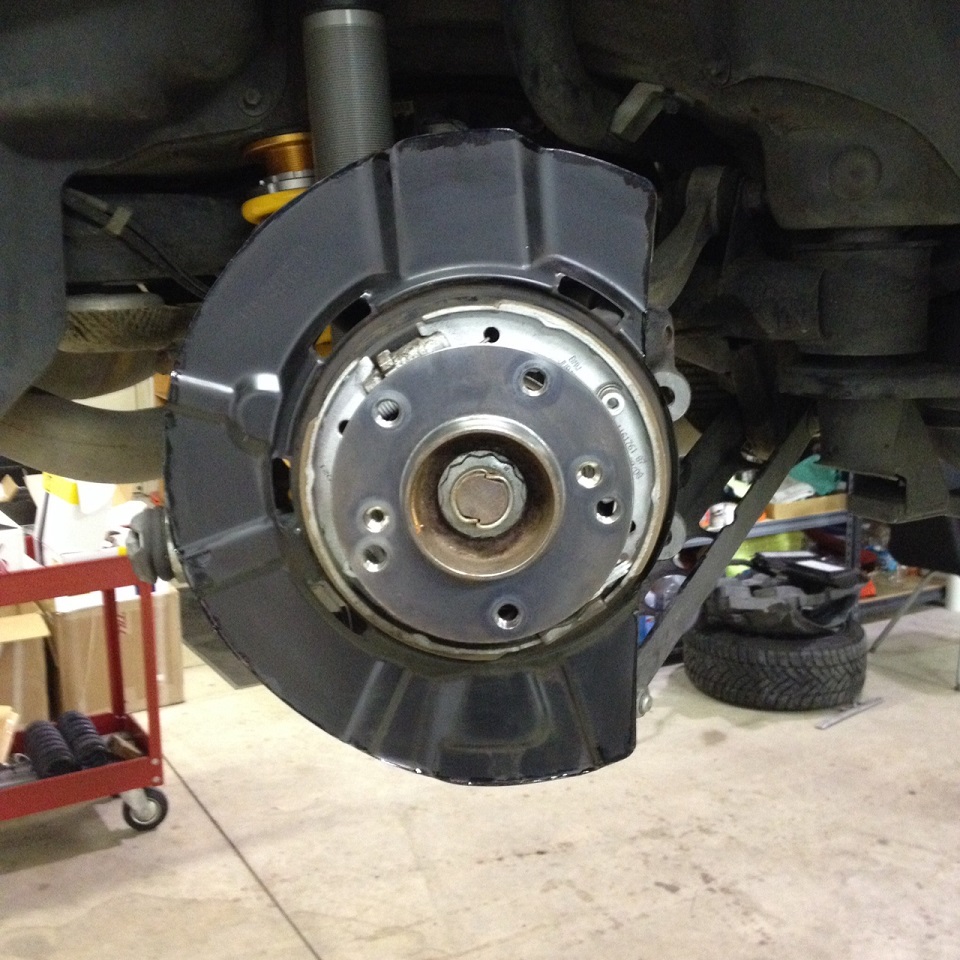
Here you can see the customized front shield installed with the aluminum caliper bracket supplied with the kit.

photo 35.jpg

The rear shields required more trimming because in stock configuration the shield wraps around the perimeter of the smaller OEM rotor. And to make things just a bit more difficult, the shield is captured behind the bearing, so the trimming had to be done while on the car.

photo 41.jpg

After the rear shields were trimmed, cleaned and exposed metal edges painted.

photo 43.jpg

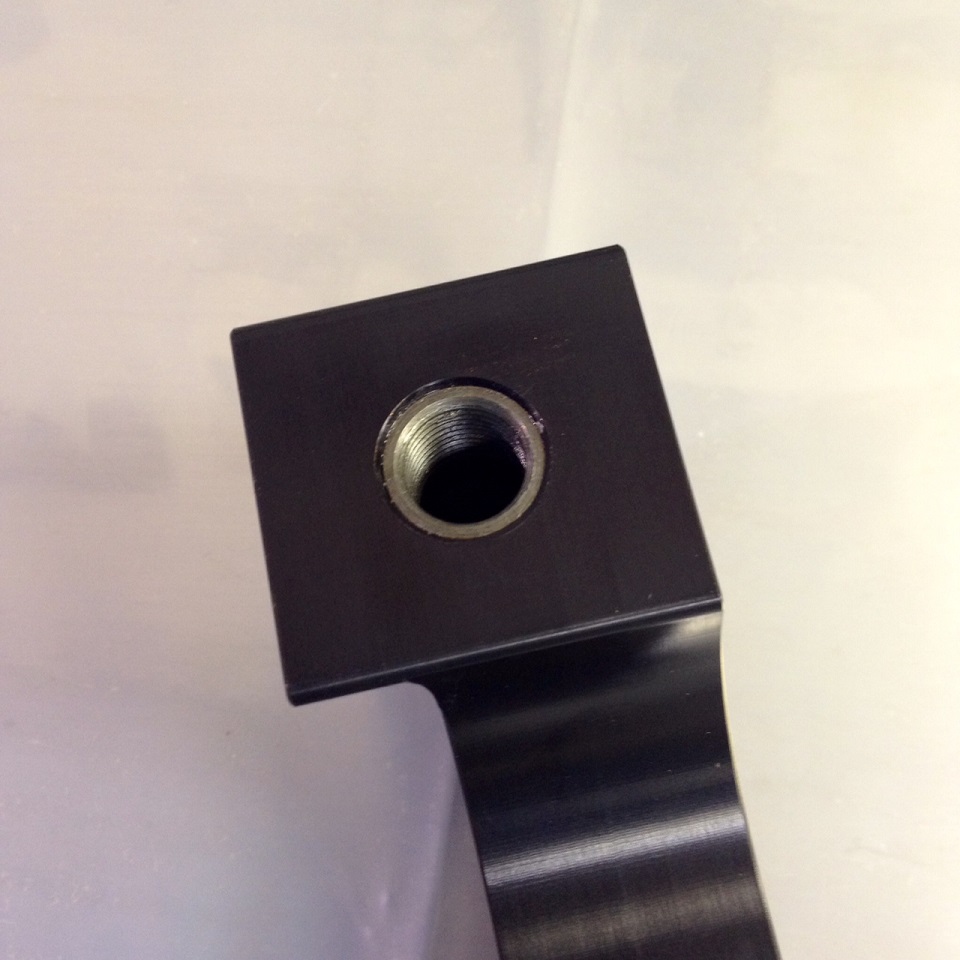
One of the small details we really liked was the steel bushings threaded into the aluminum brackets. This makes tightening the caliper bolts to torque more reliable without the possibility of stripping the threads. Google "stripped Brembo calipers on Subaru STi" and you'll understand what we mean.

photo 45.jpg

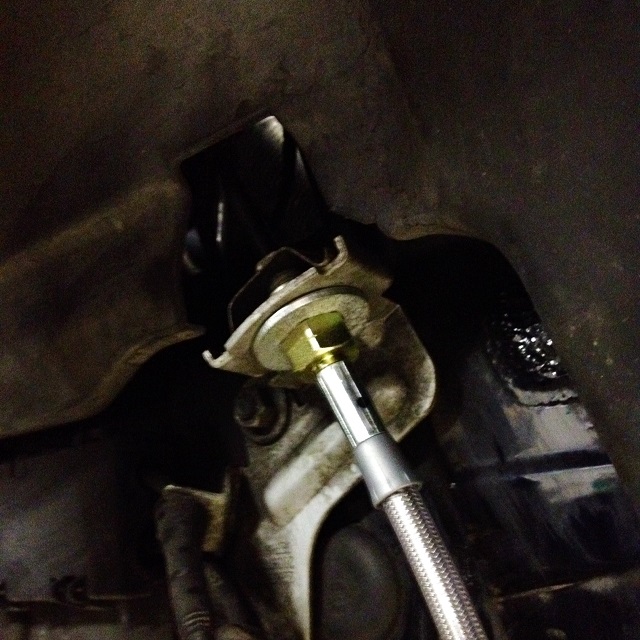
Hooking up braided brake lines is always a messy job-- they are stiffer than normal rubber lines and as soon as a drop of brake fluid hits your tools it becomes a slippery mess. Here again it is absolutely crucial that everything is clean before you start. Grit in the line or at the connection is not a good thing. We use plenty of brake clean and a small steel brush to make sure the stock hard line nipple that's on the car is clean before we thread it into the supplied brake line.

In the case of the front lines on the M3 we had to use a washer to keep the new line properly attached to the body tab.

photo 46.jpg

Here are a few pictures of the front brakes installed-- I think you'll agree they do look good.

photo 37.jpg

photo 40.jpg

******

Switching to larger brakes obviously brings with it added weight, but how much exactly? Here are some statistics for this project.

photo 48.jpg

Radi-CAL front rotor: 27.90 lbs versus Stock M3 front rotor at 21.2 lbs
Radi-CAL front caliper: 13.80 lbs versus Stock M3 front caliper at 12.7 lbs

Radi-CAL rear rotor: 20.35 lbs versus Stock M3 rear rotor at 19.3 lbs
Radi-CAL rear caliper: 9.85 lbs versus Stock M3 caliper at 10.0 lbs

*Pads included in all caliper weights.
*Stock calipers had lines attached and some residual fluid in pistons, and rotors showed some wear which is why we rounded to the nearest tenth of a pound.

As you can see, most of the weight is in the giant 370 mm rotors, but the larger calipers also add a little (except in the rear where the Radi-CAL caliper is slightly lighter).


February 24, 2014

Project Maximus Part 3

Our E92 M3 transformation is running on all cylinders, so to speak. Parts are flooding in from all corners of the world and we're well into the installation procedure. In this installment of Project Maximus we'll take a quick break from the ESS Supercharger installation and focus on the Ohlins suspension upgrades. As the old saying goes, power is nothing without control.

It seems that Ohlins is the hot set-up at the moment when it comes to suspension upgrades. And for good reason, they supply some of the best quality, well thought out coil-over suspensions at reasonable cost on the market today. Long known for their superior motorcycle dampers, Ohlins is moving full speed into the automotive market with kits available for Audis, BMWs, Porsches, Subarus, Mitsubiushi, Nissan, plus many others.

We were first introduced to them at the Performance Racing Industry (PRI) show in Orlando several years back. The engineers impressed us with their knowledge of the performance characteristics of their products as much as the products themselves stood out thanks to top notch build quality. We were impressed enough to buy a kit and install it on our own EVO IX shop car. Our testing at the track served to confirm our first impressions. These kits are good.

The main difference between Ohlins and almost every other street/ track damper on the market is their dual flow valve technology.

In its simplest form, a damper is just a piston in a tube filled with fluid. Various ports allow fluid to move from one side of the piston to the other in a controlled rate, thereby slowing down the relative movement of whatever it is attached to. In the case of Ohlins dual flow valve technology, there are three main ports through which the hydraulic fluid can flow. The needle valve in the shaft (the bullet shaped part in the center of the bodies in the image below) is the part that is adjusted by rotating an external knob on the damper (top on most rear Road and Track dampers, bottom on front dampers). How big or small this gap is determines how much damping force the unit provides.

photo 28.jpg

Ohlins goes a few steps further, by having ports designed to flow fluid at slow, medium and high shaft speeds (different damping rates for small bumps or slow corners versus a sharp impact or quick steering input). The key for any suspension system is to keep the wheels in contact with the road, thus providing maximum grip.

Again, referring to the above image, in figure 1, which highlights compression flow, at low shaft speeds, oil flows mostly through the adjustable shaft jet bleed (lower dotted arrow). At higher shaft speeds, oil flows mostly through the compression ports in the piston (upper dotted arrow). At very high shaft speeds, or during sudden shaft accelerations such as hitting a pot hole or making a fast evasive maneuver, oil can also escape through the compression ports (solid arrow) in the dual flow valve (DFV), increasing comfort while maintaining control. In figure 2, the rebound flow (when the wheel extends down) at low shaft speeds, oil flows mostly through the shaft jet bleed (lower dotted arrow). At higher shaft speeds, oil flows mostly through the rebound ports in the piston (upper dotted arrow). At very high shaft speeds, or during sudden shaft accelerations, oil can also escape through the rebound ports in the DFV (solid arrows), maintaining the all important tire contact with the road.

Another advantage of the Ohlins valve design is its ability to deal with heat. The more the dampers work, the more heat is generated due mostly to friction. As heat increases, the viscosity of the damper fluid can change, altering the car’s handling characteristics. Their unique needle bleed valve expands with temperature, closing the gap that the fluid travels through, maintaining a consistent damping rate.

We specified the BMS MI40 Road and Track Kit with Vorschlag front camber and caster plates for our Project Maximus E92 M3.

The first assembly picture is of a front strut pre-assembled on the bench. It's important the make sure everything is clean when you're assembling the kit, any small amount of grit that gets between the springs and their perch or the perch and the threads in the damper body will cause headaches down the road at a minimum or premature failure worst case. You'll note the spring compression is preset via the dimension between the top hat (camber plates) and spring perch. Height adjustment occurs by adjusting the lower collar, which will be attached to the suspension hub. We always lube the threads on the damper body with T9-- a dry lube that doesn't attract dirt but keeps the threads cleaner, longer. This will keep corrosion out and aid in adjusting ride height down the road (we've seen suspensions come into the shop where corroded perches froze to the damper body making adjustment impossible without destroying the components).

photo 23.jpg

Here's a close up of the Vorschlag camber caster plate pre-assembled on the Ohlins strut. Note we have adjusted caster to maximum for better steering turn in.

photo 24.jpg

The front strut assembly installed on the M3.

photo 25.jpg

A close-up of the front ride height collar and damper adjustment knob. This knob adjusts both compression and rebound at the same time. Some "double adjustable" dampers separate rebound and compression adjustments, allowing a bit more fine tuning. But, in general, when you're adjusting one function you should also be adjusting the other to compensate. Ohlins allocated the cost savings of the one adjustment design to dual flow valve technology and the precision engineering inside the damper.

photo 26.jpg

A view of the rear multi-link suspension with separate damper and spring with the height adjustment perch on top.

photo 21.jpg

The adjustment knob for the rear dampers is at the top, which requires some sort of access being cut into the trunk liner. Since the knob is short on the E92 kit, most shops will simply cut a window or flap in the liner over the rear damper mount where the knob can be accessed. In this case we thought we'd go the extra step by ordering an extension wire from Ohlins so that we could mount the adjuster in a place that is easier to access. This way the owner does not have to reach into the trunk and blindly fumble around adjusting his rear dampers.

photo 60.jpg

If you have not noticed by now, we like to sweat the details at VRPerformance...

Next step: AP Racing brakes.

February 19, 2014

Project Maximus Part 2

Project Maximus is well under way. We decided our first order of business would be the most complicated part of the project, the ESS supercharger installation. The supercharger really is the heart of the beast, and all of the other enhancements that we'll be adding to the black 2008 BMW M3 are designed to keep all that power under control.

But first a little history. We came into contact with ESS several years ago thanks to a new thing at the time called YouTube and the above posted video. Watching-- and listening to-- that ESS tuned E46 M3 attack the Nurburgring was a seminal moment. That grainy video still excites us to this day. And while we are well known for suspension development at VRPerformance, there is no denying the power of, well... POWER. And we're always game to adding some.

ESS was founded 1995 in Aremark, Norway. The company started out with a yearly production of 30 supercharger systems, in 2004 total production passed 1000 systems making them the largest BMW supercharger system manufacturer in the world. From 2000, they started offering a constantly growing chip tuning selection for many European models based on their extensive expertise with Bosch and Siemens engine control systems.

In September 2005 a San Diego, California based sales and support center was opened which serviced the North American market. In 2009 they purchased a new manufacturing facility in Phoenix, USA and moved their US sales and marketing team into the same building. We opened an account with them shortly after that.

photo 6.JPG

In preparation for all the work on the Maximus M3, the first thing we had to do was give the subject a good wash-- it was delivered during a snow storm after all. Not only does this keep the shop floor clean, it keeps dirt from falling into important things, like the intake or between nuts and bolts and suspension bushings. We always clean every component before we remove it and then clean every mating part before we install a new component.

Here you can see Eric vacuuming the A/C radiator before we move onto the next step.
photo 8.JPG

Along with the supercharger we're installing a higher capacity radiator and oil cooler. 211 added horsepower brings with it a good amount of heat. An upgraded cooling system can better deal with this heat and consequently helps with long-term engine reliability.

An extensive survey of the market showed very few cooling options for the E9x M3 models. We settled on a Motorsport24 radiator and oil cooler. They're expensive, but we rarely see aftermarket components with higher build quality.

German competition components manufacturer Motorsport24 created a unique water cooling solution for the E9x M3. Their over-sized water cooler is a direct fit and is hand built in their state of the art facility in the small town of Kalefeld Germany. The cooler is substantially larger than the factory radiator, and has been tested to be effective on courses like the Nurburgring, Hockenheimring, and the Motorsport Arena Oschersleben to allow the S65 engine to run cooler and longer than cars equipped with a standard radiator. We cannot emphasize enough the build quality of these components-- and they dropped into factory position without any tweaking on our part (a rarity in this business).

drv_1259.jpg

M24 rad.png

For easier access to the oil cooler, as well as some of the supercharger components, the front fascia had to be removed.

photo 7.JPG

The VT2 version of the ESS supercharger kit includes an intercooler with a front mounted cooling element. It sits in front of the oil cooler (another good reason to upgrade the oil cooler, since a little less air will be flowing thru it) and required some modifications to the structure behind the lower grille of the fascia. Here you see the element installed in front of the Motorsport24 oil cooler.

photo 9.JPG

We found the ESS supplied mounting hardware to be a bit weak, so we ended up reinforcing the brackets by attaching the top part to the fiber bumper beam.

As noted earlier, tweaking is almost always required. No matter how good a supplier is and how many years they've been in business they cannot match OEM quality fitment. Automakers spend hundreds of millions of dollars and thousands of man hours developing their products-- resources the aftermarket rarely has.

We've been in business long enough to understand that some thoughtful finessing is often required to bring the quality of the installation up to our exacting standards. More on this subject as we delve deeper into the ESS supercharger installation in our next Project Maximus entry.

February 11, 2014

Project Maximus Part 1: Introduction

Winter storm Maximus brought heavy snow and travel delays throughout the Midwest and Northeast. It also brought us a 2008 BMW M3 coupe and along with it a project that can only be described as epic. The dark M3 will be transformed from a competent foot soldier into an all-conquering supercharged gladiator.

photo 62.JPG

Few people would say the E92 class of M3 is wanting in the engine department, but as the old saying goes: you can never have enough power. The heart of Project Maximus is an ESS VT2 supercharger that boosts the already formidable V8's horsepower output of 414 to a supercar respectable 625 (and 405 ft/lbs torque).

The E9x M3 VT2-625 supercharger system comes with a high capacity liquid intercooler system and especially developed cast aluminum manifold assembly with integrated heat exchanger.

E9x_VT2_Layout__69181_zoom.JPG

Along with the hardware, a redesigned ESS MSS60 engine control software that is calibrated for the supercharged engine is included to provide optimum ignition timing under all conditions, re-calibrated EGA's for quicker throttle response, re-calibrated VANOS control and perfectly optimized fuel delivery supplied by 8 larger Bosch Motorsport injectors.

To deal with all this extra straight line speed, we'll be swapping out the stock M suspension with an Ohlins Road and Track adjustable coil-over system. The Ohlins adjustable damper's dual-flow valve technology really does an amazing job of keeping the wheels in touch with the road, thereby increasing grip and overall performance of the chassis.

_1357138518.jpg

And to bring all the fun to a safe stop, AP Racing's brand new Radi-CAL 6 piston front, 4 piston rear brake system will replace the stock binders.

10809062545_5a71b76491_c.jpg

Check back for updates as Project Maximus gets underway...