Project Maximus Part 3
Our E92 M3 transformation is running on all cylinders, so to speak. Parts are flooding in from all corners of the world and we're well into the installation procedure. In this installment of Project Maximus we'll take a quick break from the ESS Supercharger installation and focus on the Ohlins suspension upgrades. As the old saying goes, power is nothing without control.
It seems that Ohlins is the hot set-up at the moment when it comes to suspension upgrades. And for good reason, they supply some of the best quality, well thought out coil-over suspensions at reasonable cost on the market today. Long known for their superior motorcycle dampers, Ohlins is moving full speed into the automotive market with kits available for Audis, BMWs, Porsches, Subarus, Mitsubiushi, Nissan, plus many others.
We were first introduced to them at the Performance Racing Industry (PRI) show in Orlando several years back. The engineers impressed us with their knowledge of the performance characteristics of their products as much as the products themselves stood out thanks to top notch build quality. We were impressed enough to buy a kit and install it on our own EVO IX shop car. Our testing at the track served to confirm our first impressions. These kits are good.
The main difference between Ohlins and almost every other street/ track damper on the market is their dual flow valve technology.
In its simplest form, a damper is just a piston in a tube filled with fluid. Various ports allow fluid to move from one side of the piston to the other in a controlled rate, thereby slowing down the relative movement of whatever it is attached to. In the case of Ohlins dual flow valve technology, there are three main ports through which the hydraulic fluid can flow. The needle valve in the shaft (the bullet shaped part in the center of the bodies in the image below) is the part that is adjusted by rotating an external knob on the damper (top on most rear Road and Track dampers, bottom on front dampers). How big or small this gap is determines how much damping force the unit provides.
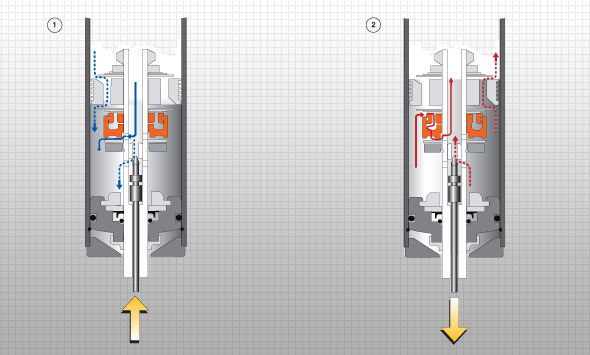
Ohlins goes a few steps further, by having ports designed to flow fluid at slow, medium and high shaft speeds (different damping rates for small bumps or slow corners versus a sharp impact or quick steering input). The key for any suspension system is to keep the wheels in contact with the road, thus providing maximum grip.
Again, referring to the above image, in figure 1, which highlights compression flow, at low shaft speeds, oil flows mostly through the adjustable shaft jet bleed (lower dotted arrow). At higher shaft speeds, oil flows mostly through the compression ports in the piston (upper dotted arrow). At very high shaft speeds, or during sudden shaft accelerations such as hitting a pot hole or making a fast evasive maneuver, oil can also escape through the compression ports (solid arrow) in the dual flow valve (DFV), increasing comfort while maintaining control. In figure 2, the rebound flow (when the wheel extends down) at low shaft speeds, oil flows mostly through the shaft jet bleed (lower dotted arrow). At higher shaft speeds, oil flows mostly through the rebound ports in the piston (upper dotted arrow). At very high shaft speeds, or during sudden shaft accelerations, oil can also escape through the rebound ports in the DFV (solid arrows), maintaining the all important tire contact with the road.
Another advantage of the Ohlins valve design is its ability to deal with heat. The more the dampers work, the more heat is generated due mostly to friction. As heat increases, the viscosity of the damper fluid can change, altering the car’s handling characteristics. Their unique needle bleed valve expands with temperature, closing the gap that the fluid travels through, maintaining a consistent damping rate.
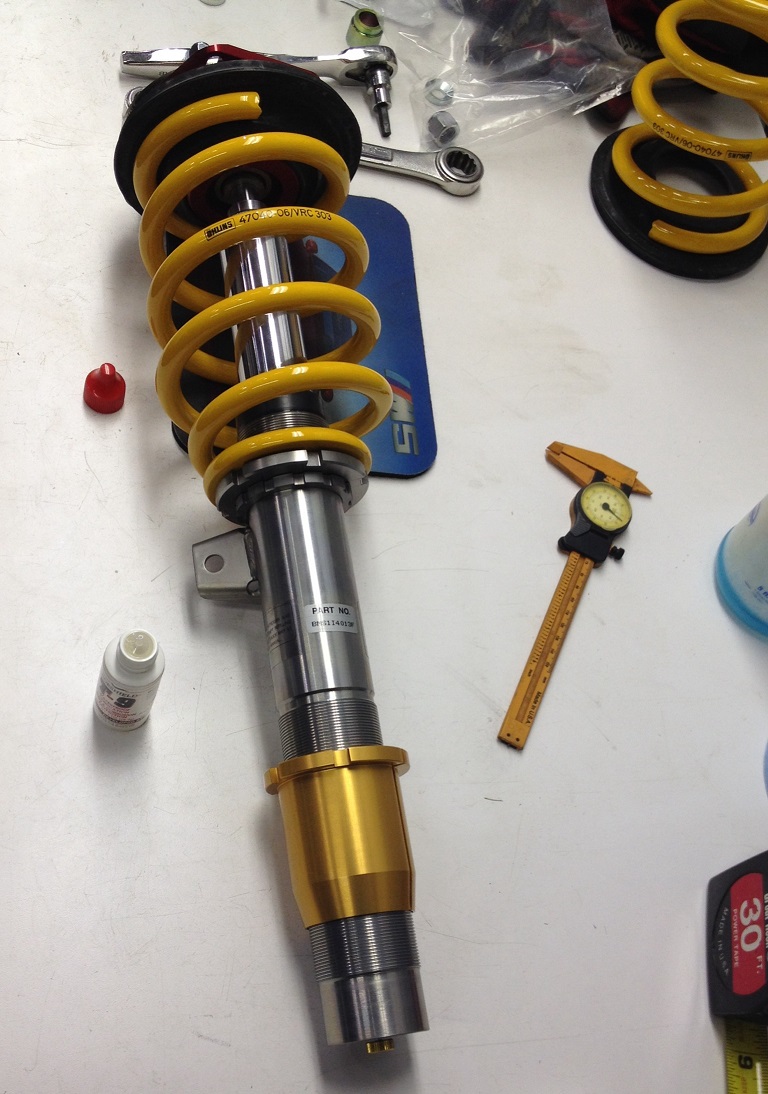
We specified the BMS MI40 Road and Track Kit with Vorschlag front camber and caster plates for our Project Maximus E92 M3.
The first assembly picture is of a front strut pre-assembled on the bench. It's important the make sure everything is clean when you're assembling the kit, any small amount of grit that gets between the springs and their perch or the perch and the threads in the damper body will cause headaches down the road at a minimum or premature failure worst case. You'll note the spring compression is preset via the dimension between the top hat (camber plates) and spring perch. Height adjustment occurs by adjusting the lower collar, which will be attached to the suspension hub. We always lube the threads on the damper body with T9-- a dry lube that doesn't attract dirt but keeps the threads cleaner, longer. This will keep corrosion out and aid in adjusting ride height down the road (we've seen suspensions come into the shop where corroded perches froze to the damper body making adjustment impossible without destroying the components).
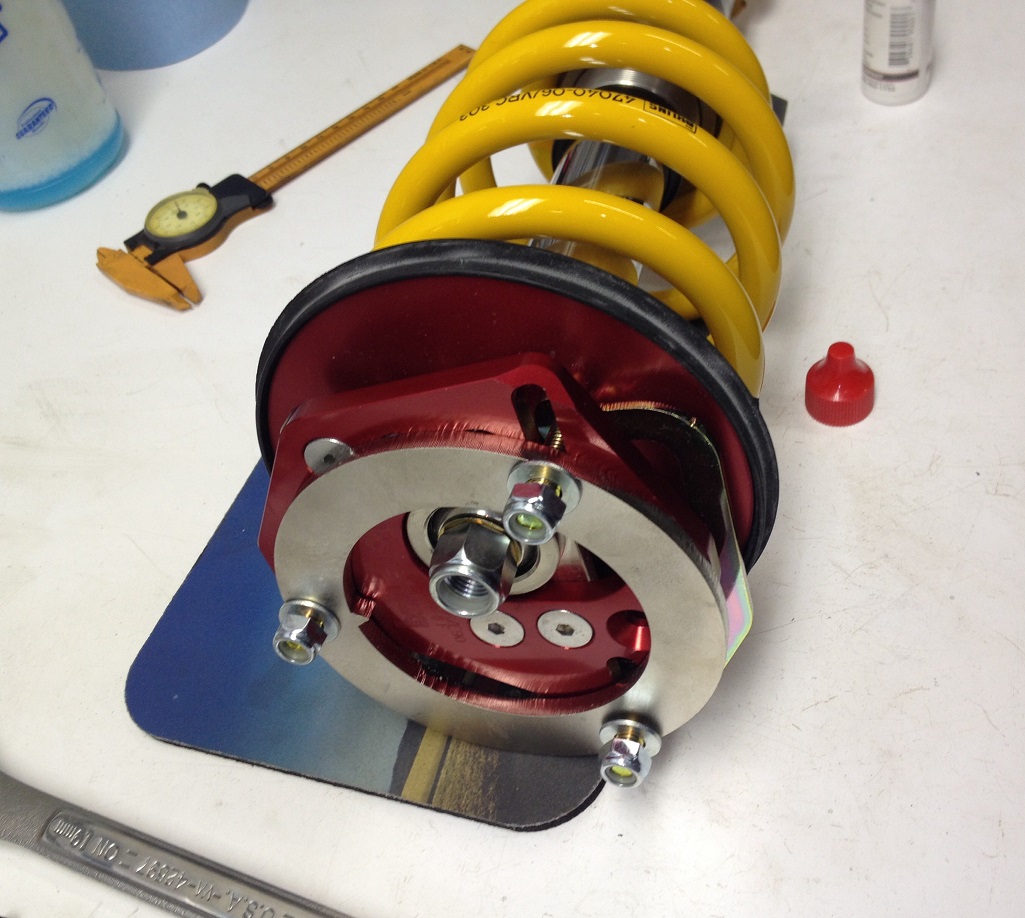
Here's a close up of the Vorschlag camber caster plate pre-assembled on the Ohlins strut. Note we have adjusted caster to maximum for better steering turn in.
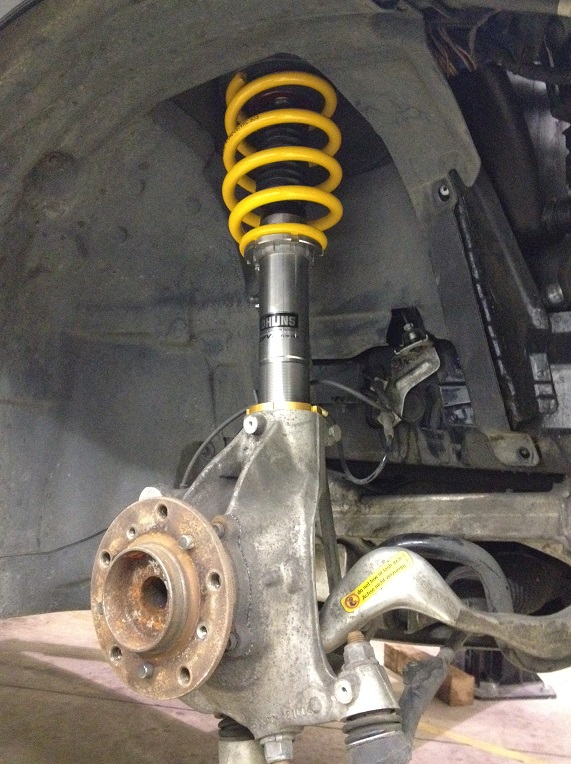
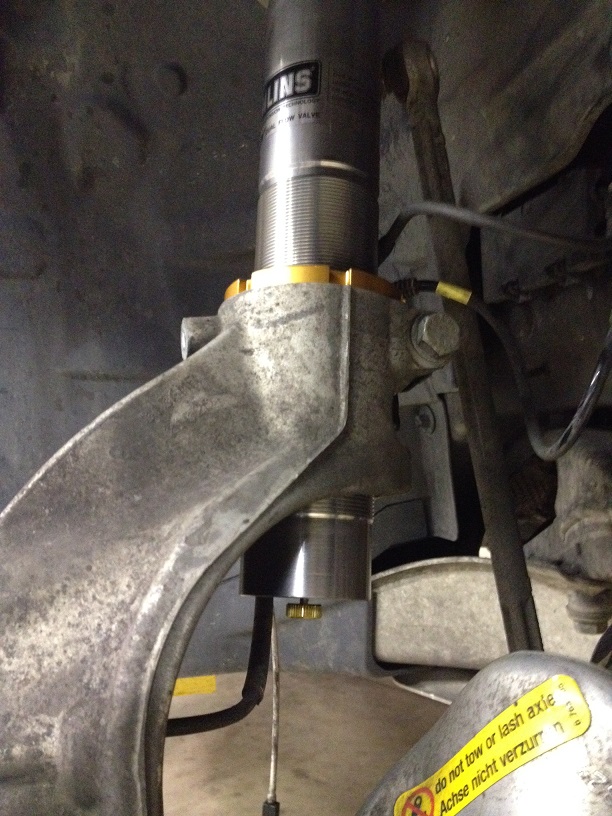
The front strut assembly installed on the M3.
A close-up of the front ride height collar and damper adjustment knob. This knob adjusts both compression and rebound at the same time. Some "double adjustable" dampers separate rebound and compression adjustments, allowing a bit more fine tuning. But, in general, when you're adjusting one function you should also be adjusting the other to compensate. Ohlins allocated the cost savings of the one adjustment design to dual flow valve technology and the precision engineering inside the damper.
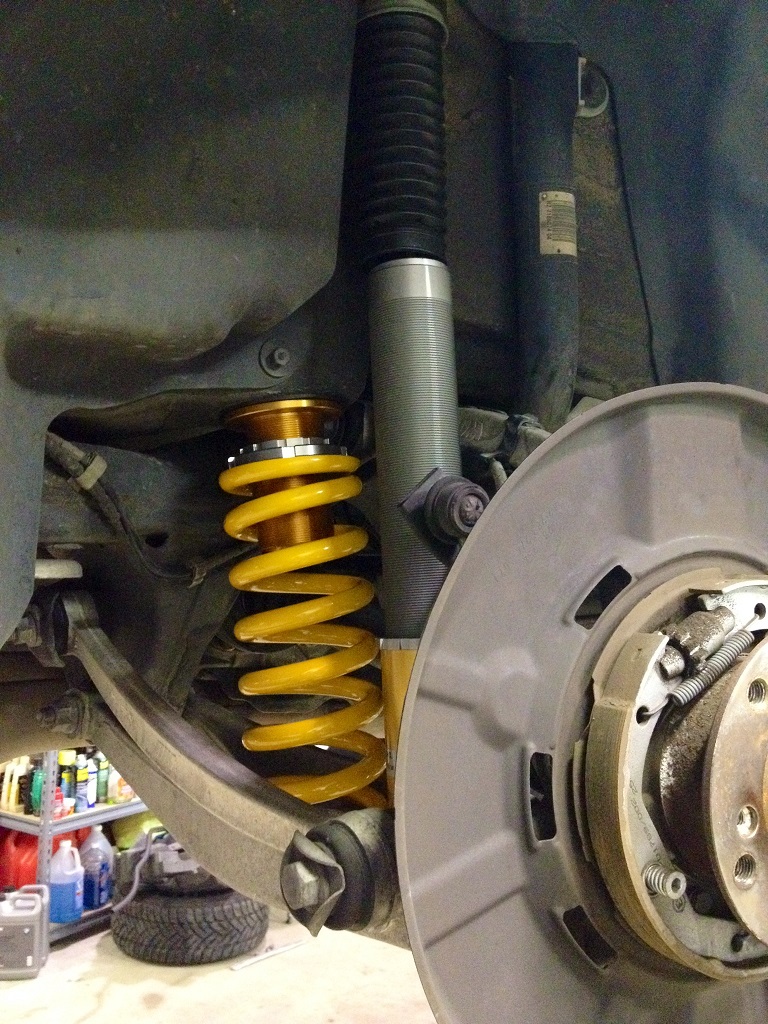
A view of the rear multi-link suspension with separate damper and spring with the height adjustment perch on top.
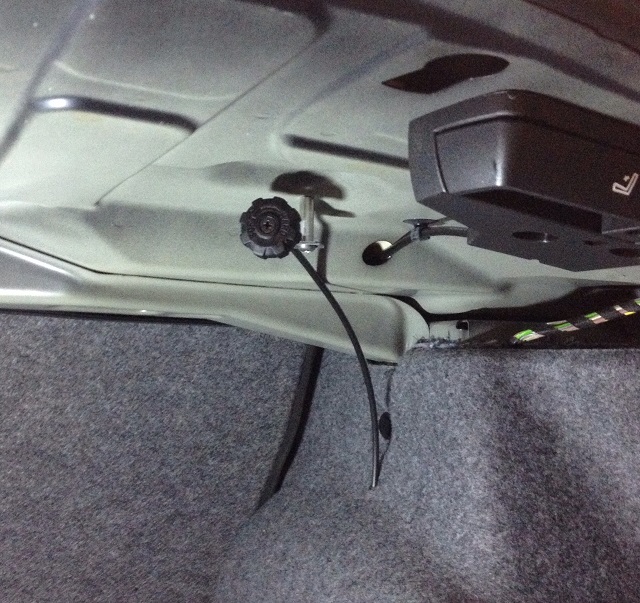
The adjustment knob for the rear dampers is at the top, which requires some sort of access being cut into the trunk liner. Since the knob is short on the E92 kit, most shops will simply cut a window or flap in the liner over the rear damper mount where the knob can be accessed. In this case we thought we'd go the extra step by ordering an extension wire from Ohlins so that we could mount the adjuster in a place that is easier to access. This way the owner does not have to reach into the trunk and blindly fumble around adjusting his rear dampers.
If you have not noticed by now, we like to sweat the details at VRPerformance...
Next step: AP Racing brakes.