« February 2008 | Main | April 2008 »

March 19, 2008

Breathe In, Breathe out (Si part 2)

One of the earliest entries in this blog describes the installation of an Injen brand cold air intake and exhaust system on a Mazda6. We described the quality of the kits coming from Injen then, and let me just say, two years later, that their products continue to impress. Case in point, we just installed the same type of Injen components on a new Civic Si sedan and were again happy with the outstanding quality and fitment.

You'll recognize the Civic from an earlier installment titled, Don't Take Our Word for It This time around we swapped out the stock airbox with an Injen short ram intake and the stock muffler with an Injen axle back unit. The added performance may be slight on the road, but at the track-- where engines sing in high RPM notes-- the better breathing will be noticeable.

Breathe In
Here we have the new Injen short ram cold air intake installed, a perfect fit:

DSC00608a.jpg

Breathe Out
A quick comparison of the mufflers:
DSC00597a.jpg

Installed. Note the quality of finish and the perfect welds:
DSC00604.JPG

Tip: One thing we always do when installing an aftermarket exhaust is
1) use anti-seize compound on nuts and bolts to help prevent corrosion and make it easier to unbolt sections if ever needed

DSC00599a.jpg

2) use specialized joint compound between the section to help seal the joints and

DSC00600.JPG

3) wipe everything down with an evaporative cleaner that leaves no residue (in this case brake cleaner) so that the oils used in manufacture will not ruin the finish of all the new shiny bits.

DSC00601.JPG

The owner has some more plans for this car, so stay tuned!

March 15, 2008

Goat Shafted

The drive shaft on the modern GTO is a known weak link, and when any modifications are made to the power output, it is a good idea to upgrade it. The last time we checked in with this particular GTO, you'll remember we released some extra power from the 6 liter V8 by opening up the exhaust system. The suspension was already tweaked with some better bushings all around, so we tackled the driveline here.

The stock drive shaft is two peices, only 2 inches in diameter, and mounted via rubber mounts. All this adds up to a weak link between the transimssion and the ground. The two piece design and rubber couplings also cause tremendous wheel hop during aggressive launches. The customer chose an all aluminum, solid mount, drive shaft from BMR Fabrication. Here you can see the difference between the OEM unit (top) and the BMR piece (bottom):

GTO-DSL.jpg

This new driveshaft should be capable to handle up to 900 hp.

The install had issues with some of the parts not fitting properly and requiring re-machining. Also, when the rear bushings were installed (and may I add, not by us) the bolts were grossly over-torqued. Despite these issues, the end result is good, and the customer will now be able to use all of the car's power without fear or destroying the driveshaft or having to deal with excessive wheel hop.

DSC00543.JPG

March 09, 2008

EVO Suspension, Brake Upgrade

The last time we saw this particular Mitsubishi EVO was back in September when we installed new sway bars and upgraded the suspension bushings, Truly EVO Sway Bar Install. This time around we're replacing the stock struts with Ohlins units and upgrading the braking system with a custom brake cooling duct kit, stainless steel braided lines and new rotors at all around.

The quality of Ohlins dampers is well known-- some of the best (and most expensive) sport bikes in the world have Ohlins suspensions as standard issue. As you can see here the kit is beautifully machined and well constructed:

DSC00553.JPG

Here's a shot of the rear units pre-assembled:

DSC00557.JPG

Since the EVO has strut assemblies at all four corners, swapping them out with new units is pretty straightforward. The key of course is to pre-assemble the new struts with the utmost of care and attention to detail, making sure all setting and torques are proper. Once the Ohlins kit was pre-assembled, we were able to install them on the car:

DSC00574.JPG

Notice that we cleaned the mating surfaces, especially where the new camber plates meet the body. It is very important to make sure not to have any road grit between the surfaces!

DSC00565.JPG

Since we specialize in suspension tuning, the install was pretty standard for us. The brake ducts on the other hand took a great deal of time and finessing. There is very little room between the front of the car where the air inlets are installed to the brake rotors, where the air is ultimately delivered. The install of the ducts required the removal of the entire front fascia, belly pan and parts of the wheel wells just to gain access to the routing of the duct work.

Here you see us making some modifications to the fascia in order to mount the air inlets:

DSC00564.JPG

On the passenger side we had to cut an oval through the air conditioning duct:

DSC00570.JPG

You can see that the space is tight. Our major concern was to route the duct from the inlet to the brake without it being pinched or rubbing up against anything and allowing enough slack so that the wheels can be turned lock to lock.

DSC00571.JPG

DSC00575.JPG

DSC00573.JPG

Our final upgrade for this project was to swap the OEM rotors, pads, brake lines and fluid for some higher performance kit. Thanks to the car being a daily driver and track car, the brakes were caked with a great deal of dust, dirt and clag. As always we first gave everything a thorough cleaning before we installed the new parts-- this adds time, but we will not install new parts on dirty surfaces, especially when you're dealing with safety itmes like the brakes! Some of the brake components, such as the piston dust boots, are in pretty bad shape and will need to be replaced some time soon. And as is typical, the new brake lines didn't fit into the stock holders, so some fab work had to be done as well as cleaning the tar from the too small mounting brackets.

This EVO is now ready for some track action with its new high end suspension and thoroughly upgraded braking system. We can't wait to see what's next on the customer's list of projects...

March 08, 2008

E30 M3 Rebuild: Suspension

The second phase of our E30 M3 winter project is to tackle the suspension (see E30 M3 Rebuild: Brakes for phase one). We began by first inspecting the suspension on the ground as well as checking to see how the car behaved dynamically on the road. We decided, along with the car's owner, to go ahead and replace the dampers at all four corners, upgrade the sway bar size to help flatten the cornering characteristics as well ad eliminate some of the understeer, and replace some of the worn out suspension bushings. We tried to replace every stock part with a more performance oriented equivalent since the car will primarily be a track tool and not a boulevard cruiser. That means the around town ride quality may suffer a little, but with the payback coming on the track.

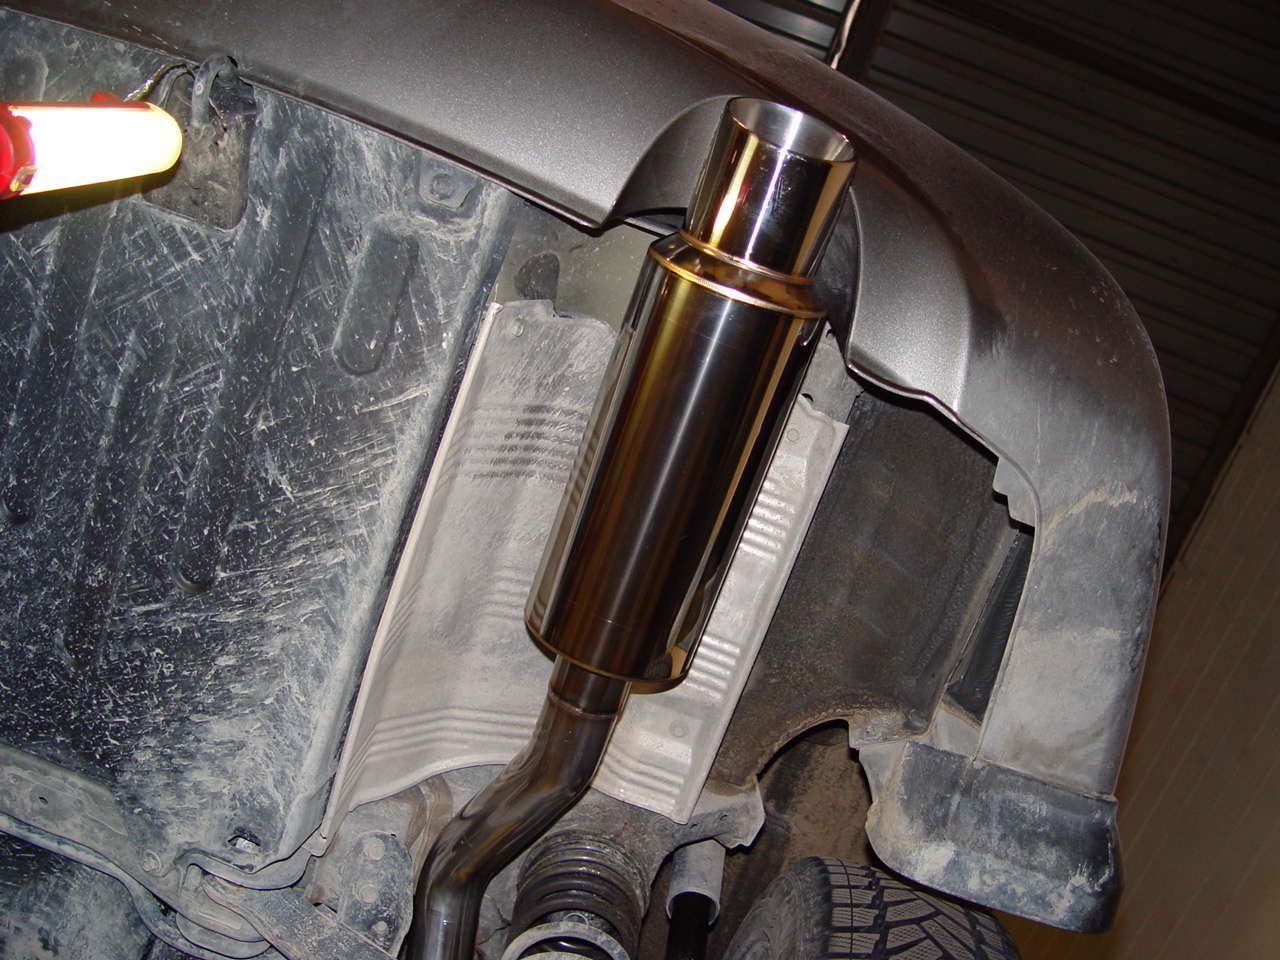
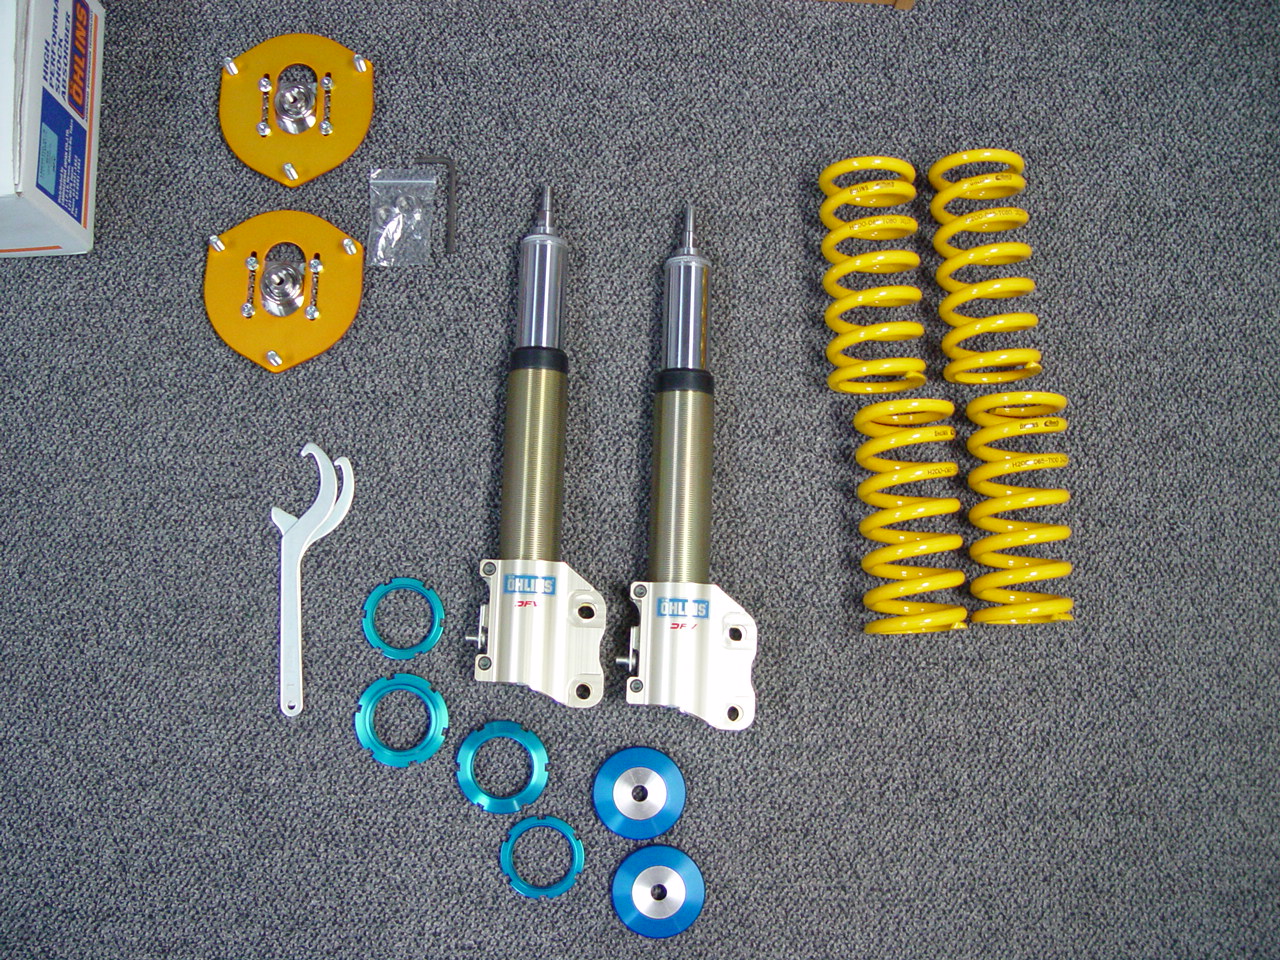
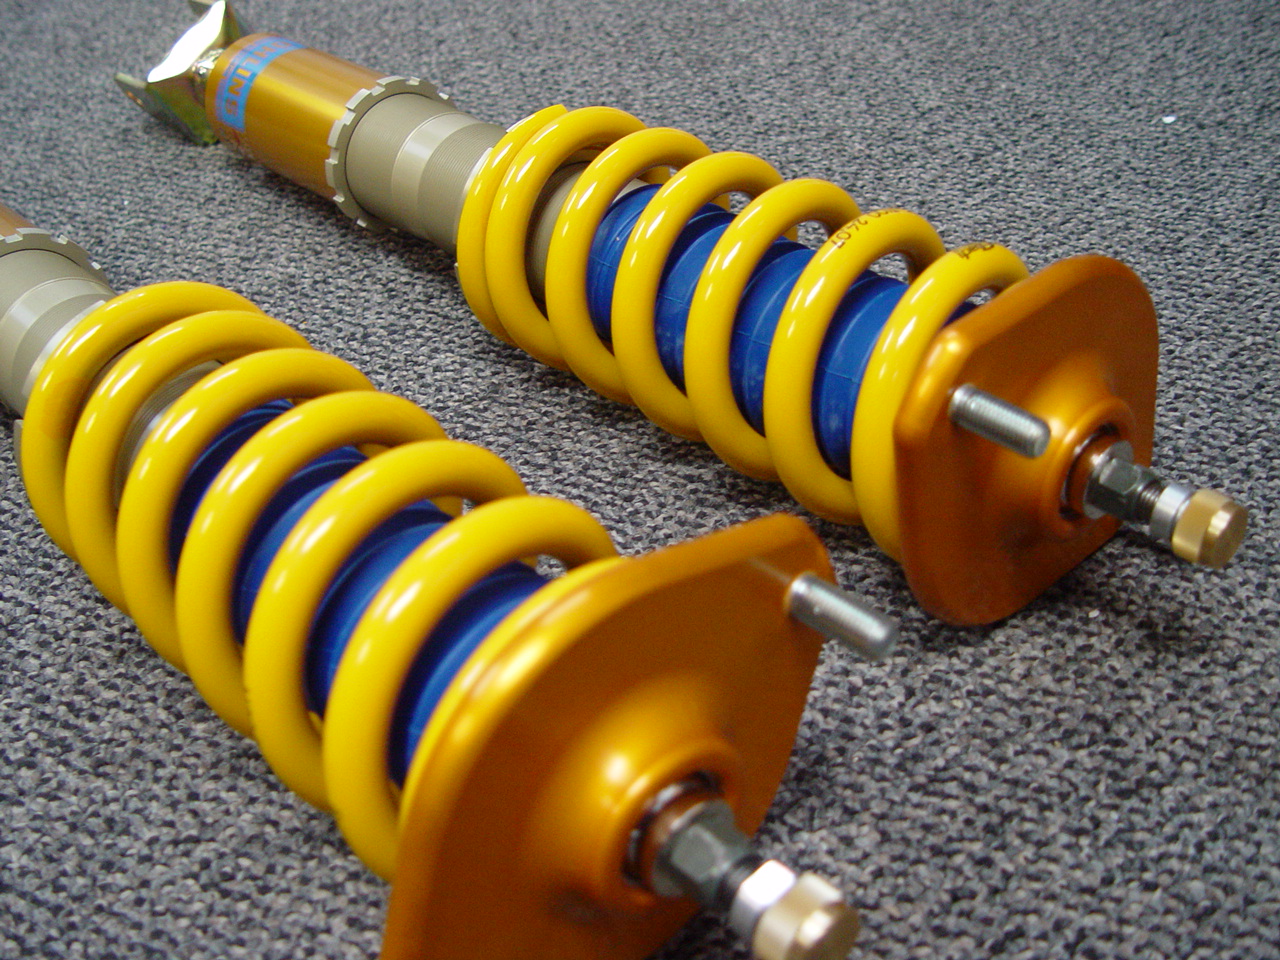
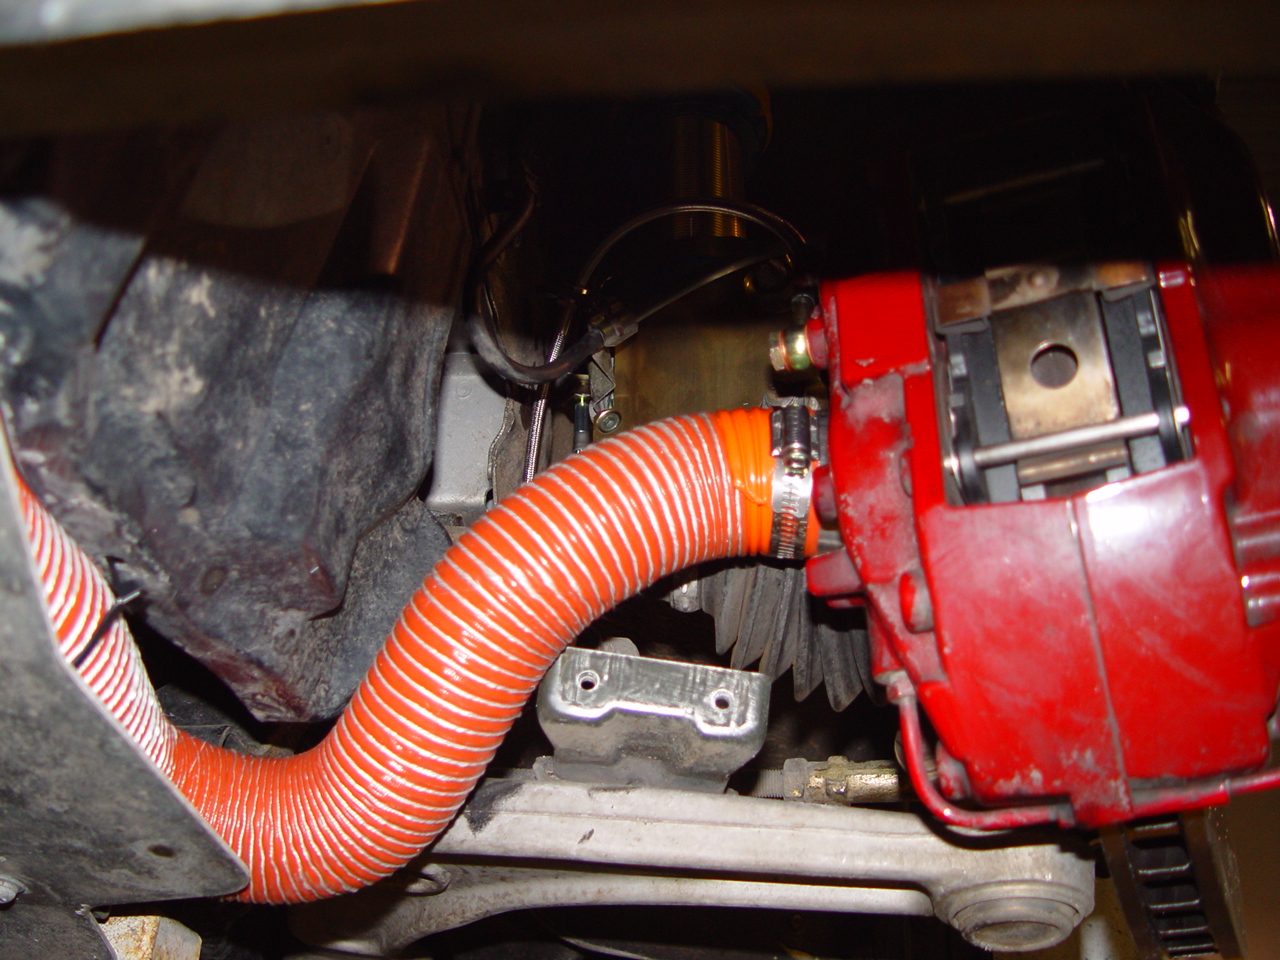
We went with Turner Motorsports J Stock spec Bilstein dampers. The rear dampers (shocks) are a new inverted design, meaning that the body of the damper is mounted at the top and the piston rod is attached to the suspension arm. This reduces the amount of unsprung weight carried at the rear which theoretically helps in handling. Here you can see the damper body and the upgraded upper shock mount:

DSC00549.JPG

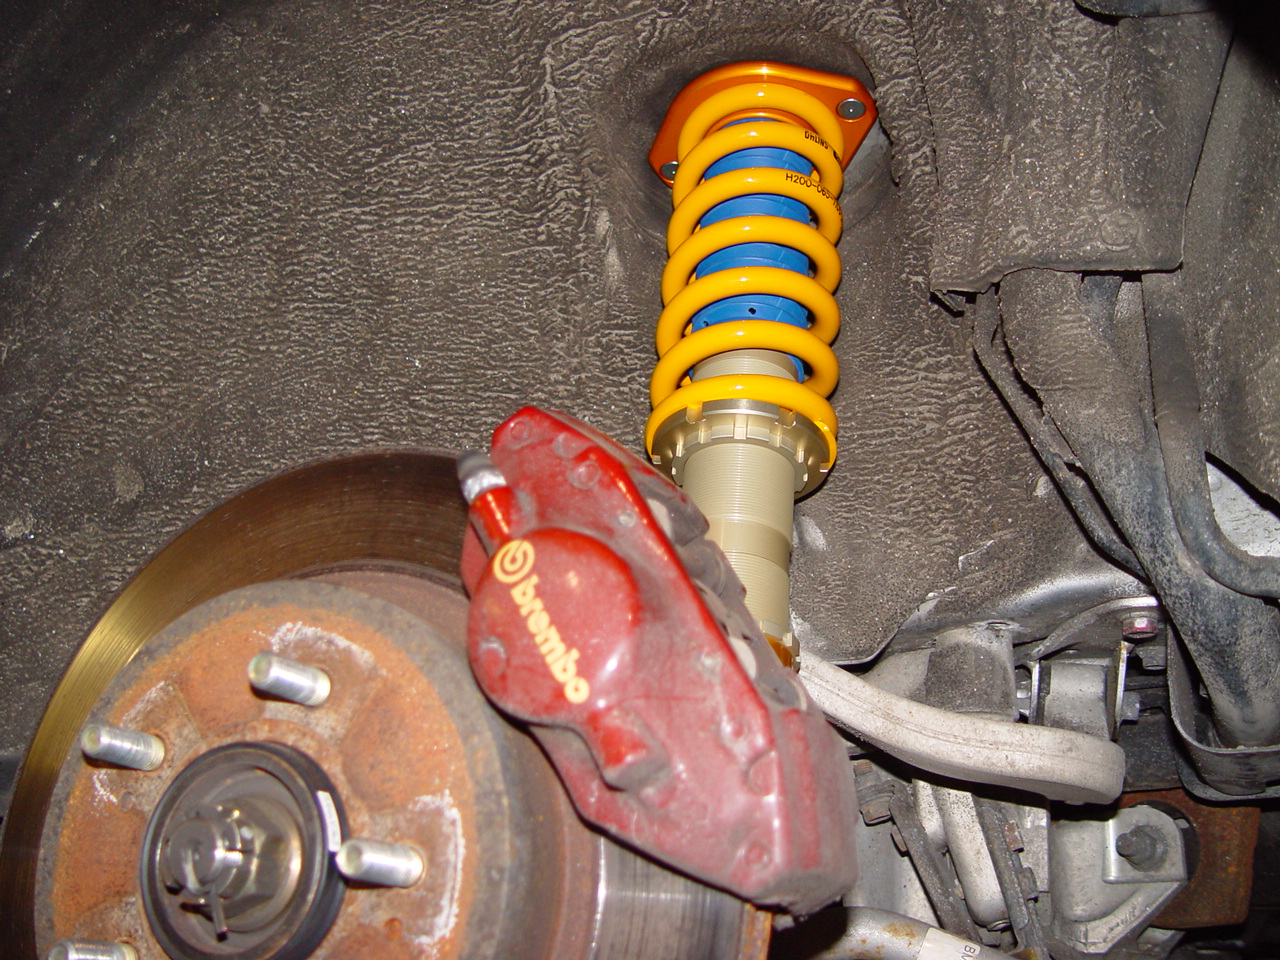
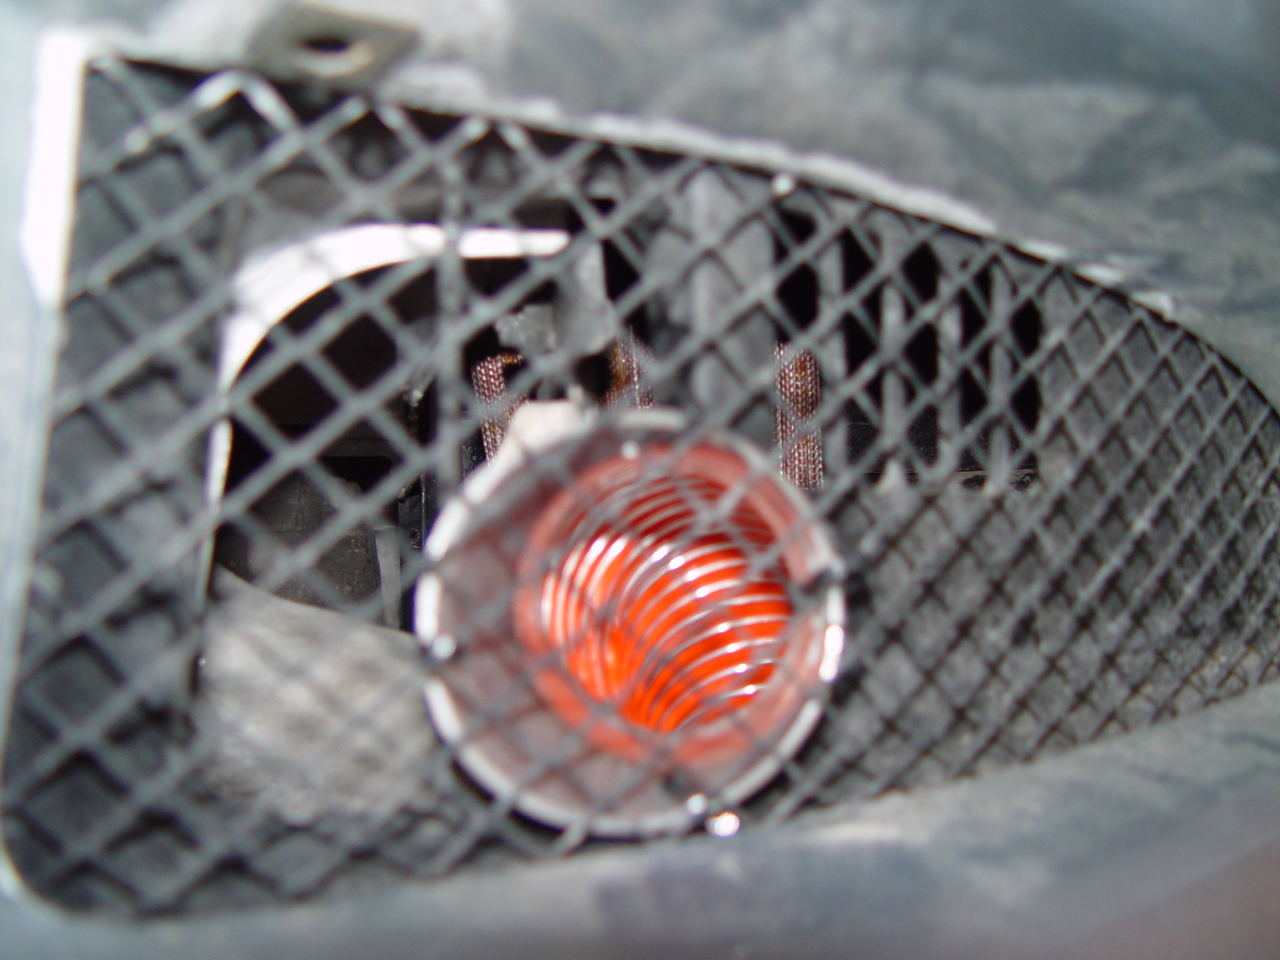
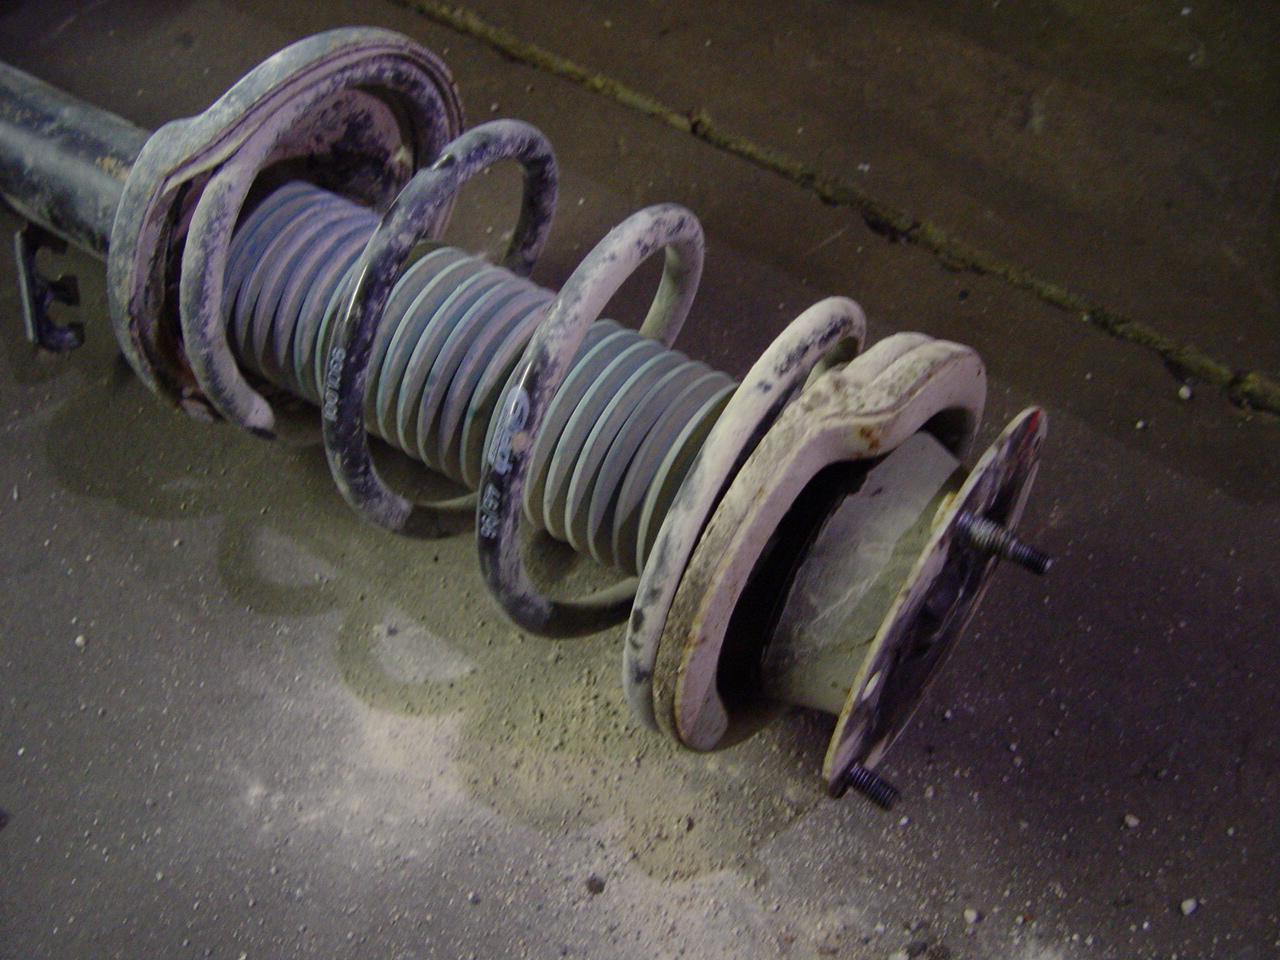
The front strut suspension on an E30 M3 uses damper inserts or cartridges. In other words, the damper body in inserted into the strut housing and is trapped, along with the coil spring by the upper mount. Here is the entire strut assembly removed from the car:

DSC00494.JPG

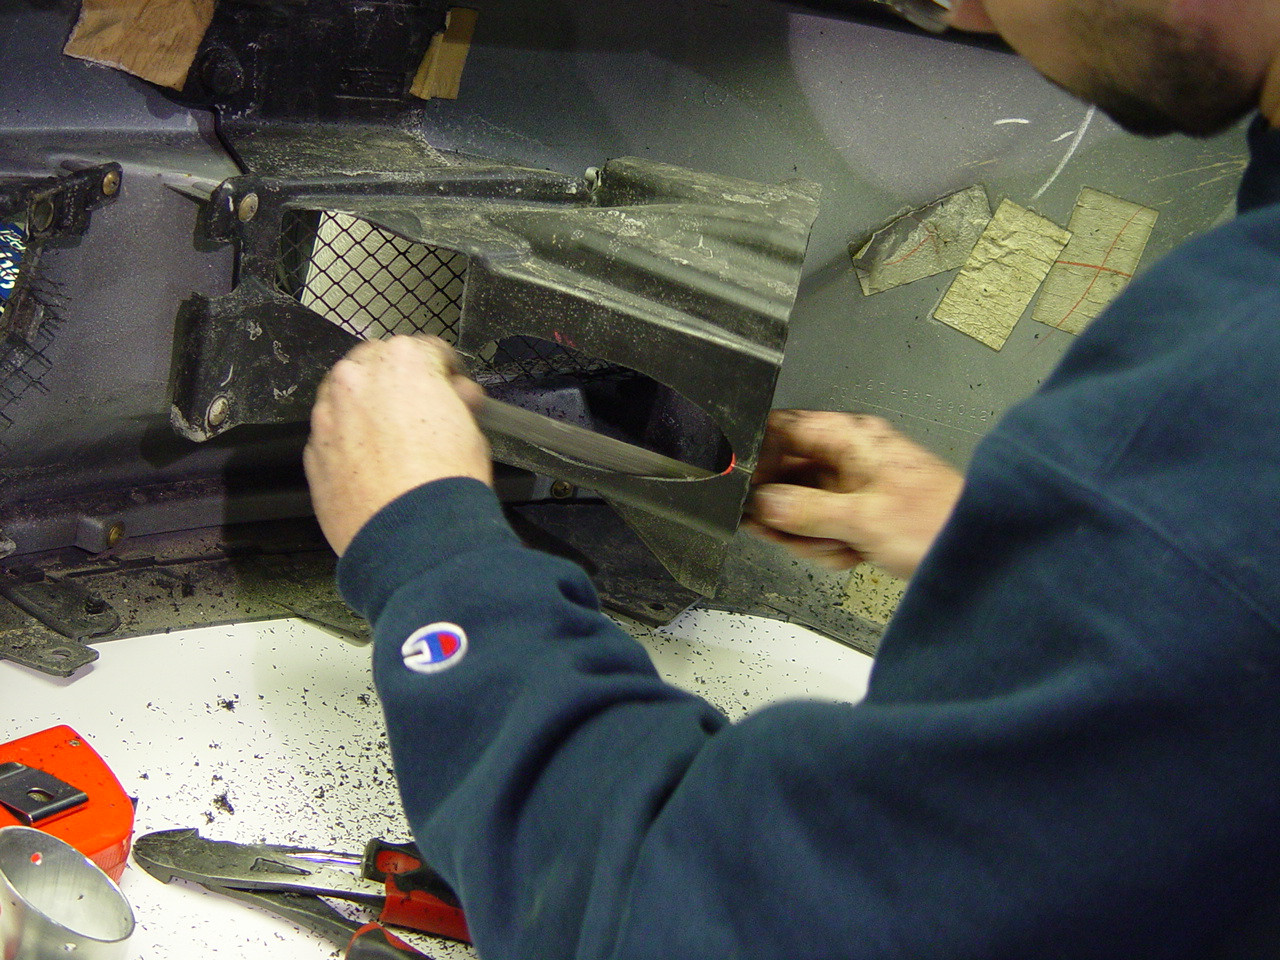
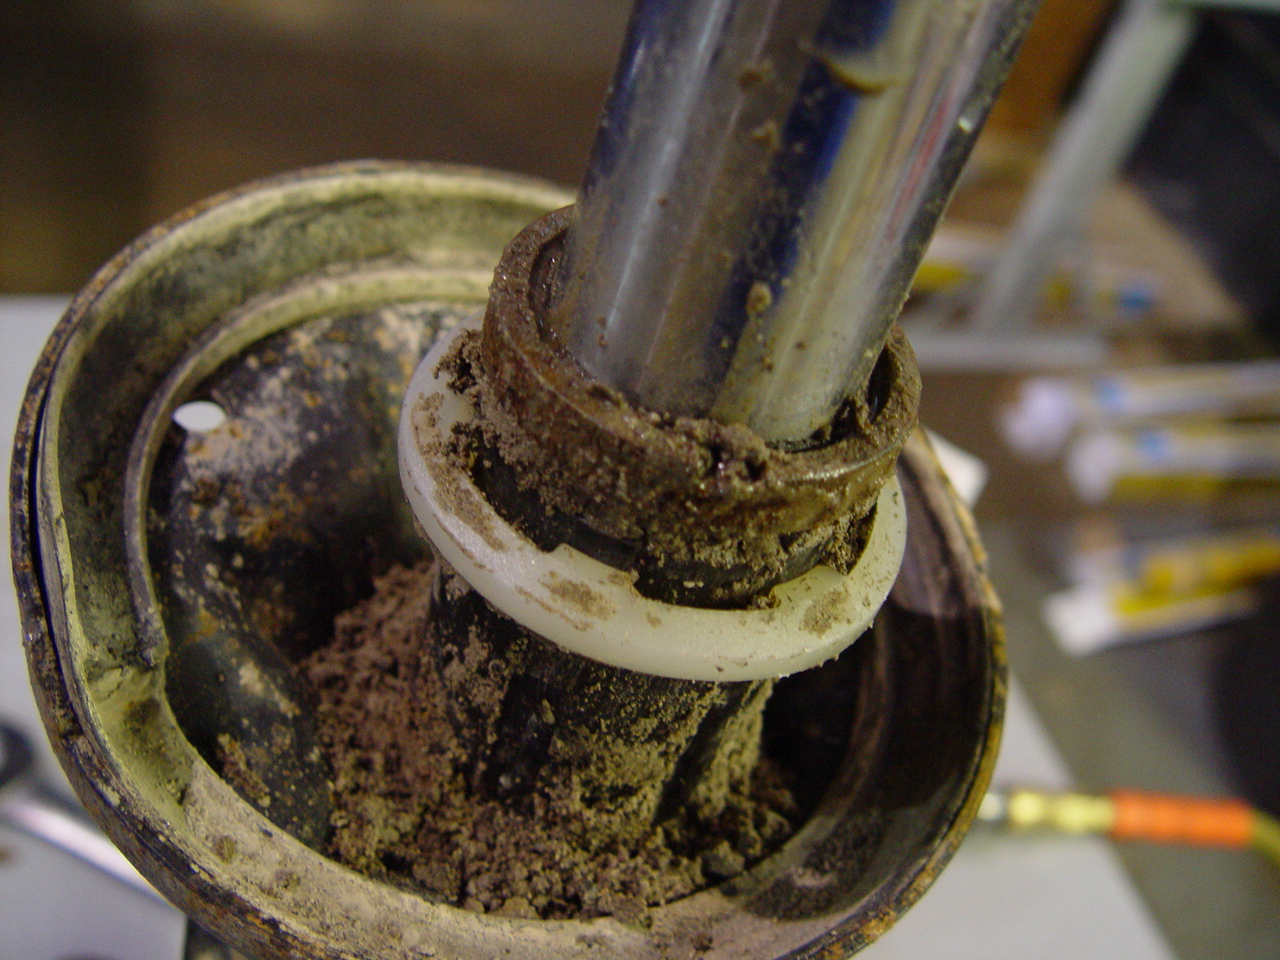
Thanks to time and road conditions, a great deal of dirt and muck found its way into the strut assembly and dampers:

DSC00502.JPG

Since the front strut assemblies were out of the way, it was a good time to replace the front lower control arms. The control arms on earlier E30 models were made of steel. Later BMW began using aluminum arms, to save on unsprung weight. The problem with the aluminum arms is that they tend to fail sooner than the steel ones. It is common practice therefore to replace these arms, along with the ball joints, on a regular basis. We opted for the OEM aluminum arms, noting the date they were replaced for future reference (see paint marks):

DSC00547.JPG

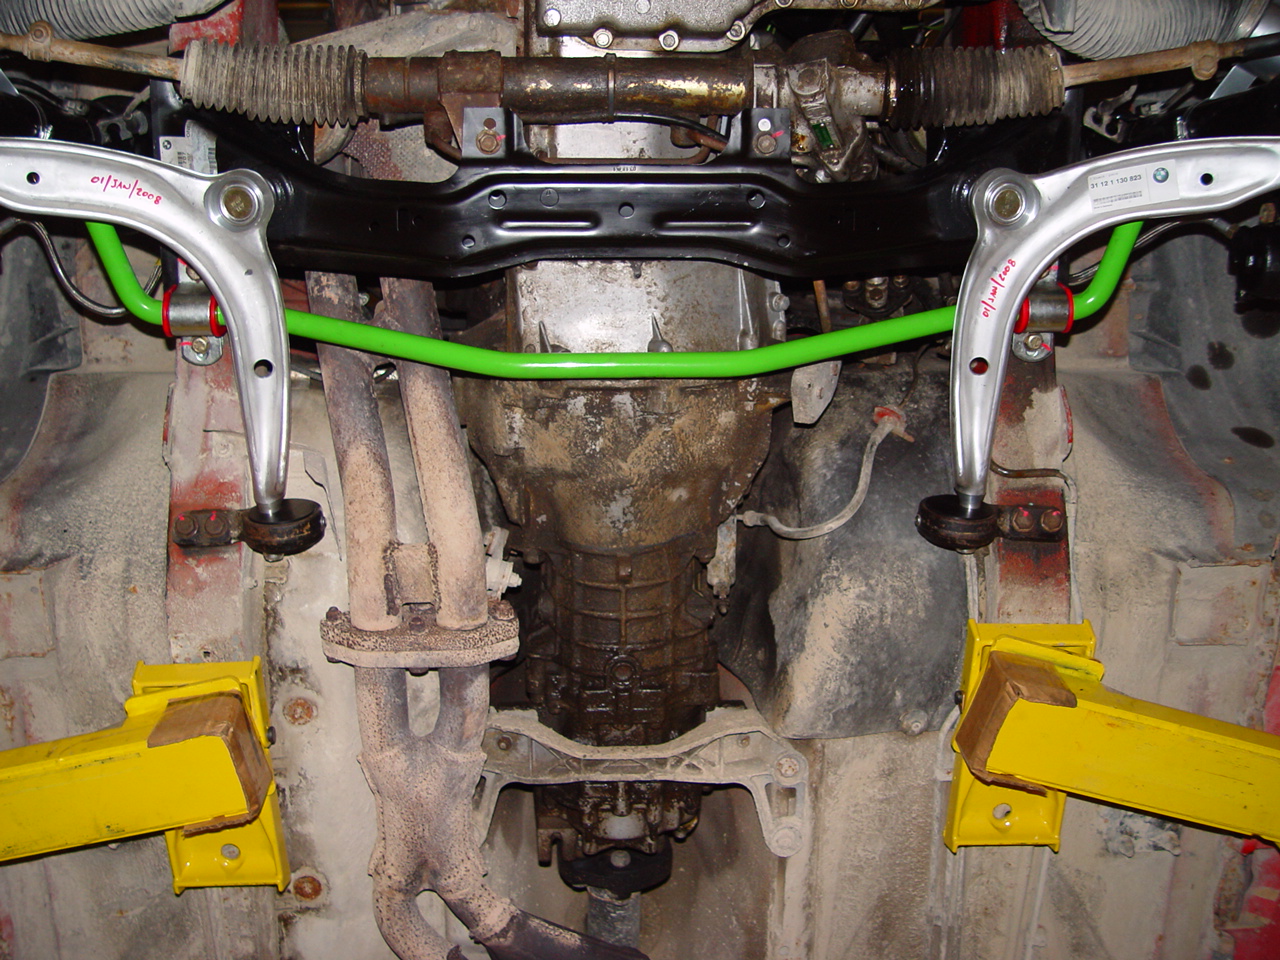
In the above picture you can also see the new ST brand sway bar as well as the offset Delrin lower control arm bushings (the rear most mounting bushing on the control arms). As noted earlier, we decided to replace stock componentry with higher performance aftermarket equipment where it made sense. The stock bushings are made of soft rubber to help isolate the noise and vibration coming from the front suspension into the cabin. The downside is that the rubber allows the arms to move about under load, changing the suspesion dynamics especially in corners. The more solid Delrin material eliminates this potential motion and helps "tighten up" the front end. Having the mount offset adds camber and caster compared to stock, an added benefit at the track.

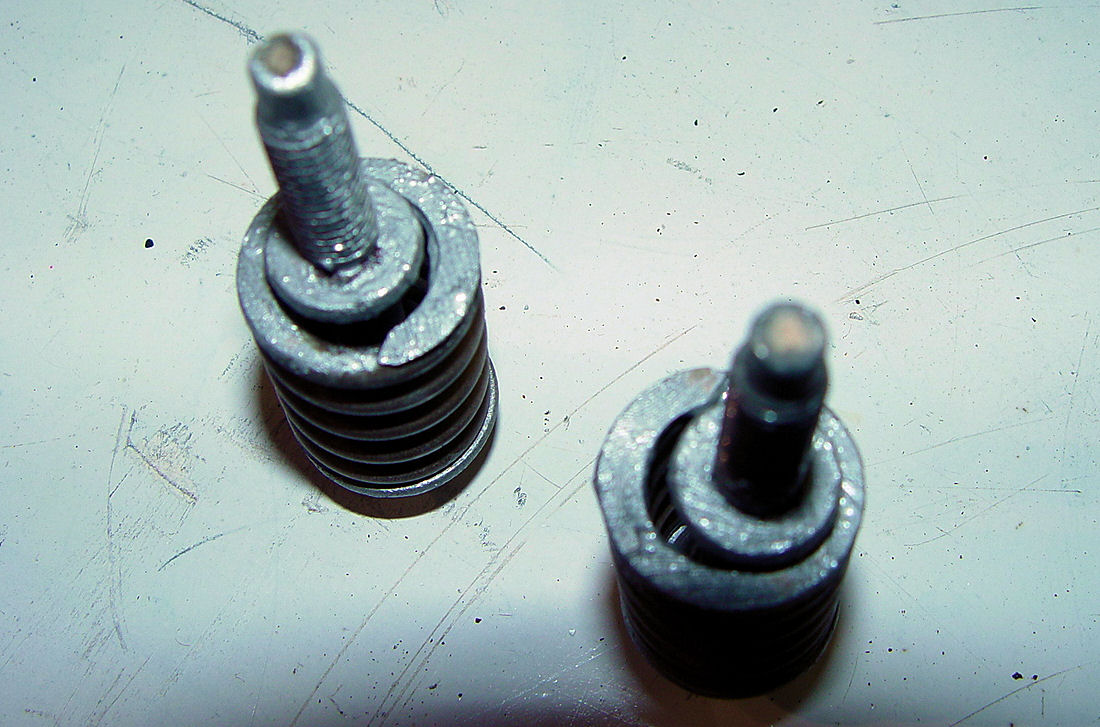
A close look at the photo will also reveal that the front axle carrier, or sub-frame, is new. Here's another weak link in the E30 suspension and an item well worth checking out while your mucking about in that area anyway. Thankfully we went ahead and checked, since it had indeed failed:

DSC00508.JPG

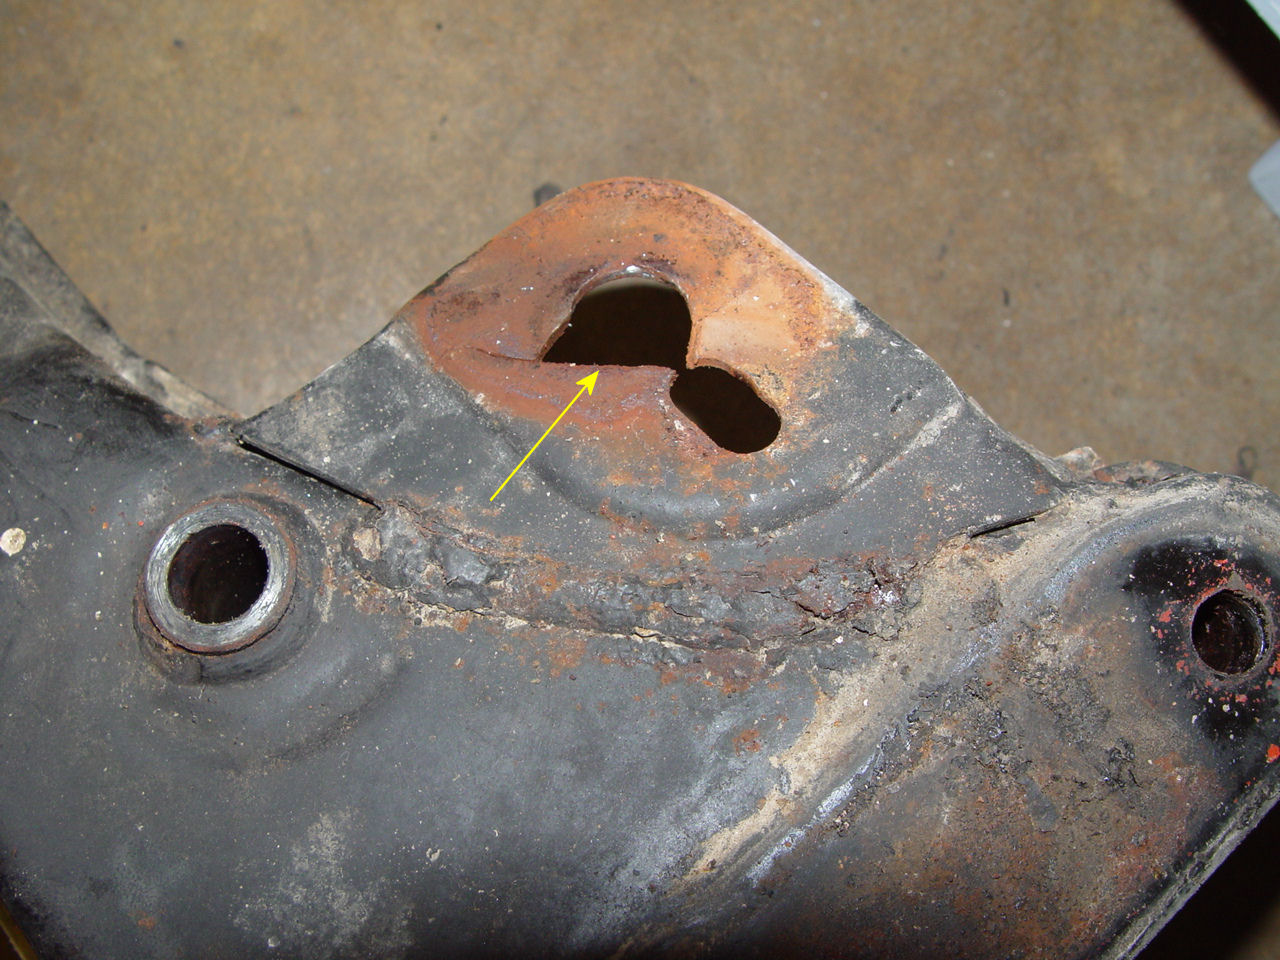
The area around the engine mount failed completely on the passanger side, and cracks were evident on the drivers side:

DSC00509.JPG

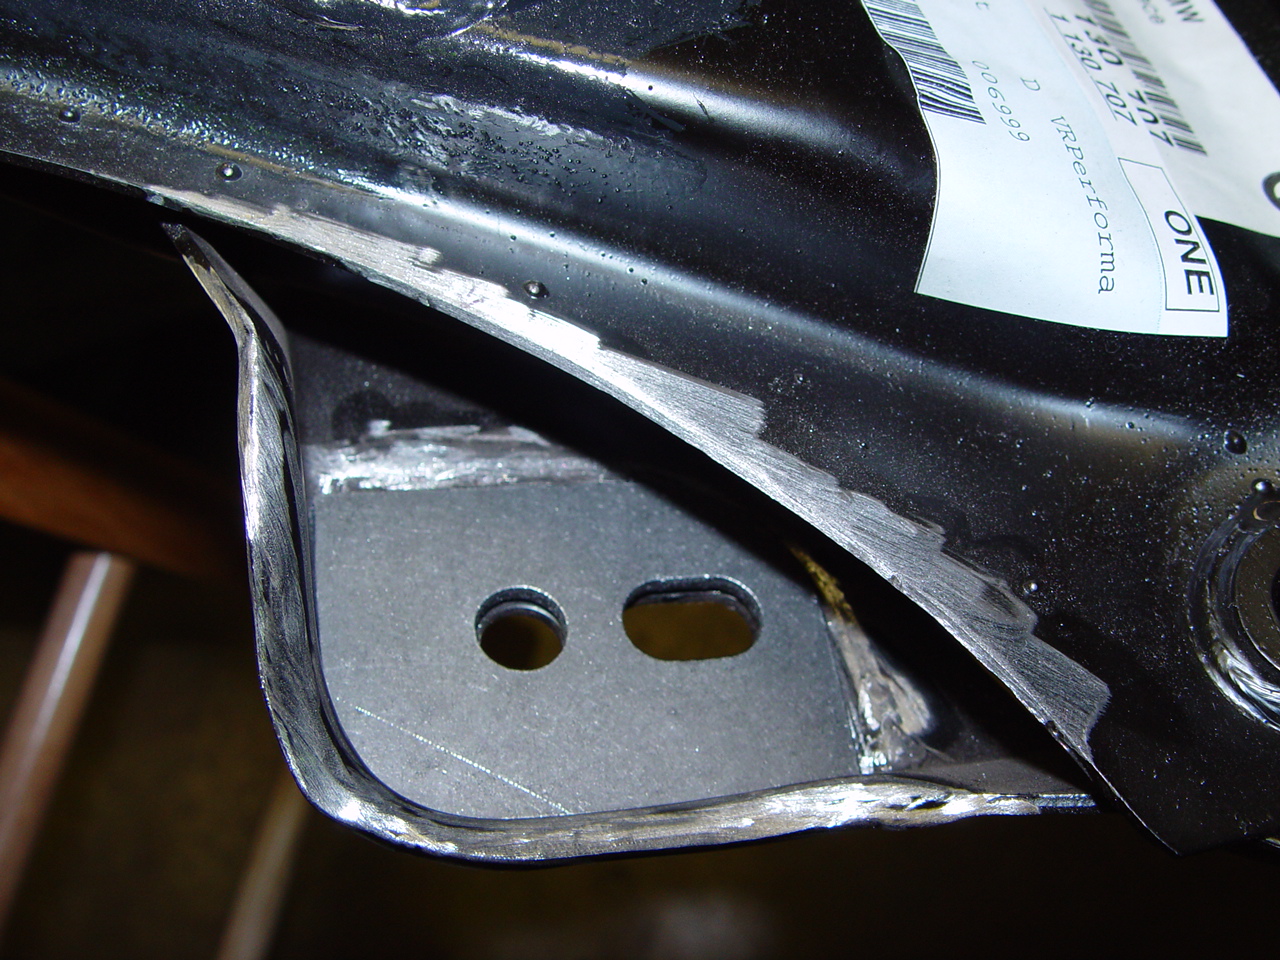
A brand new carrier is relatively cheap (considering how important of a safety itme it is) so we went ahead and ordered a new one from BMW. But before we installed it, we reinforced the weak areas by first welding a plate to the mounting surface, doubling the thickness of the steel:

DSC00523.JPG

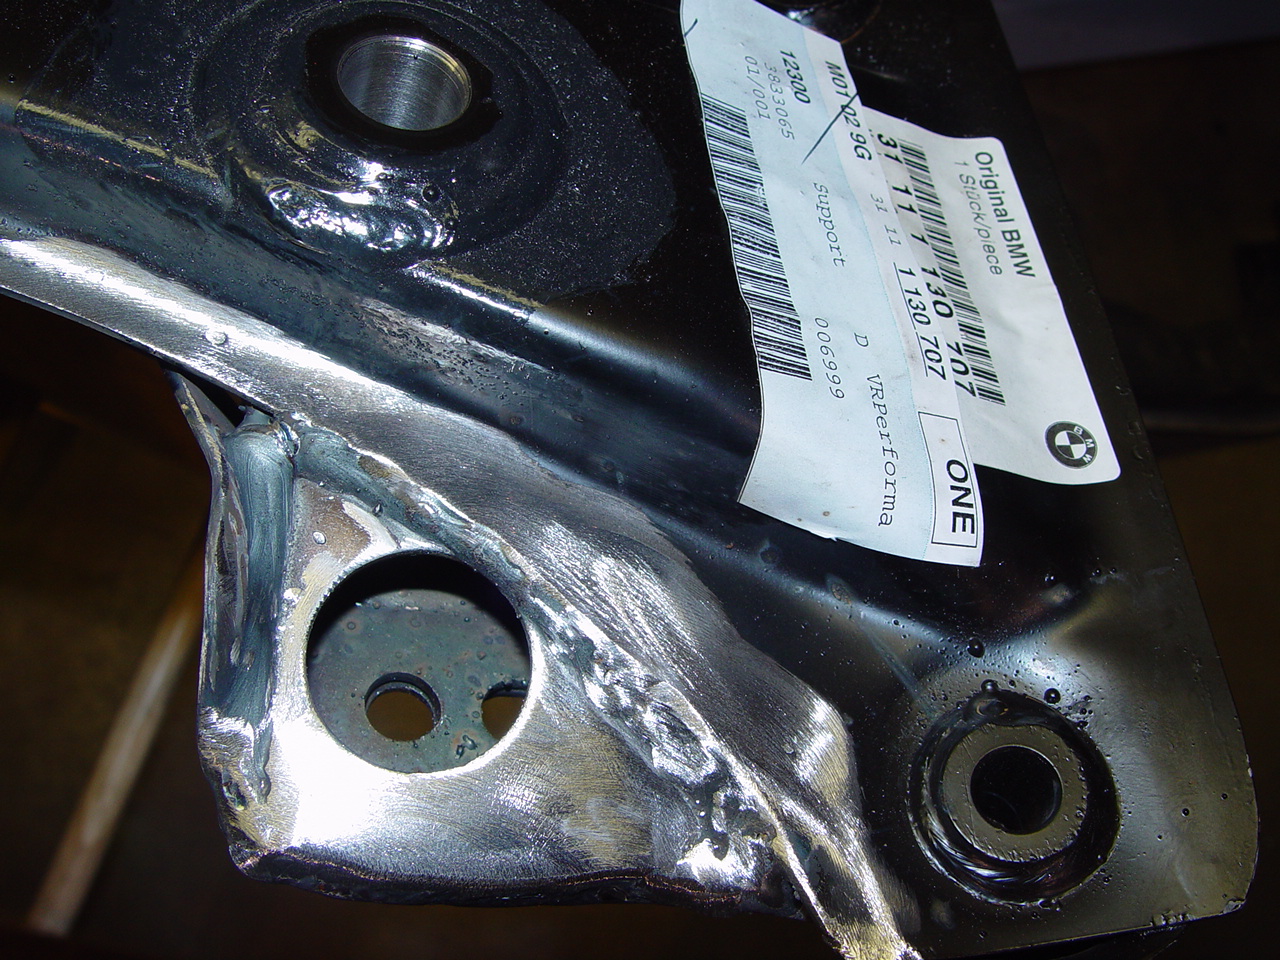
Then we welded on another piece and essentially created an utlra strong box section:

DSC00524.JPG

Taking these simple but vital steps will assure that the suspension will be up to the rigors of track driving.

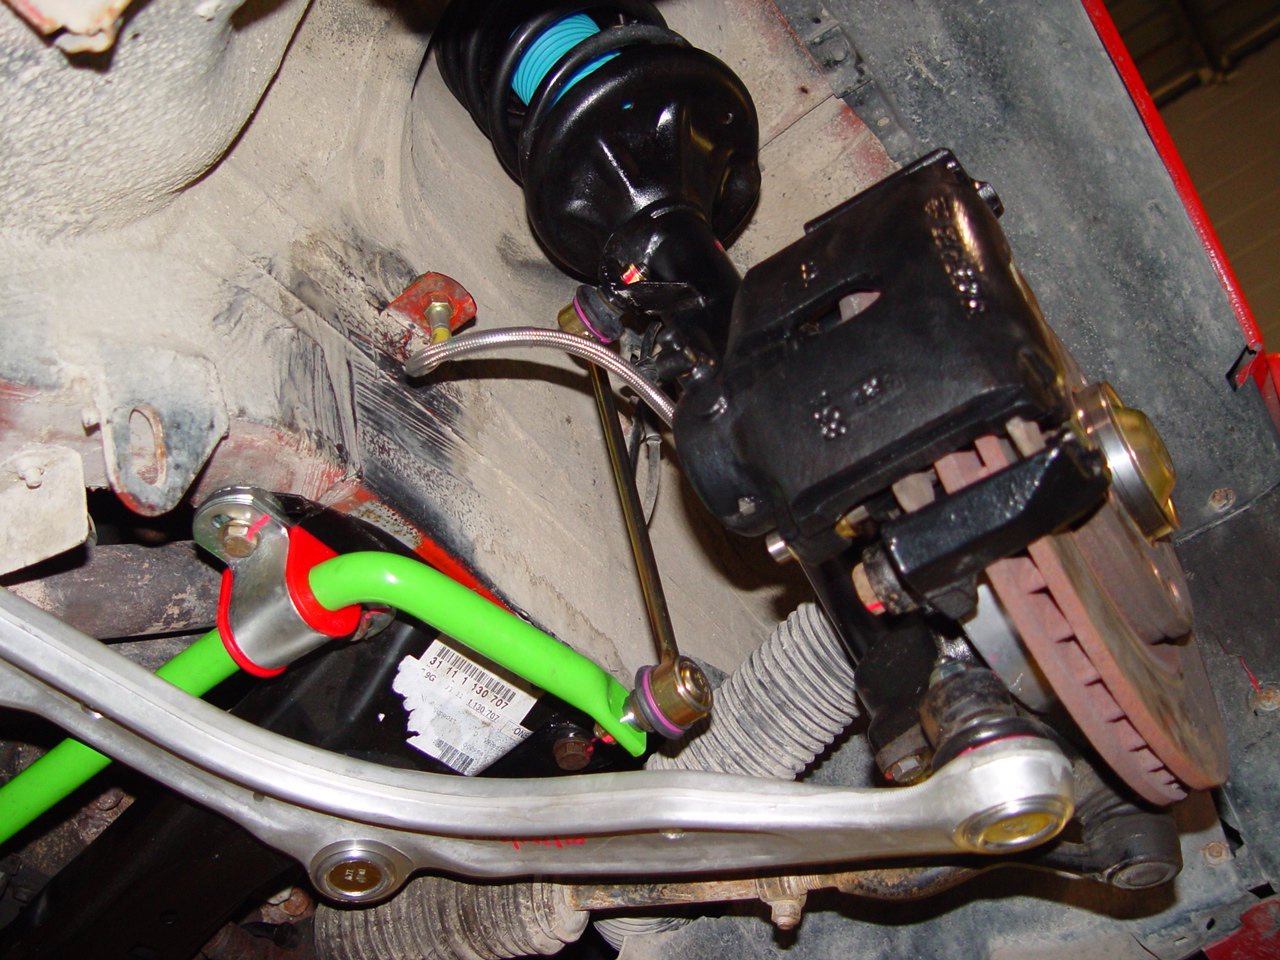
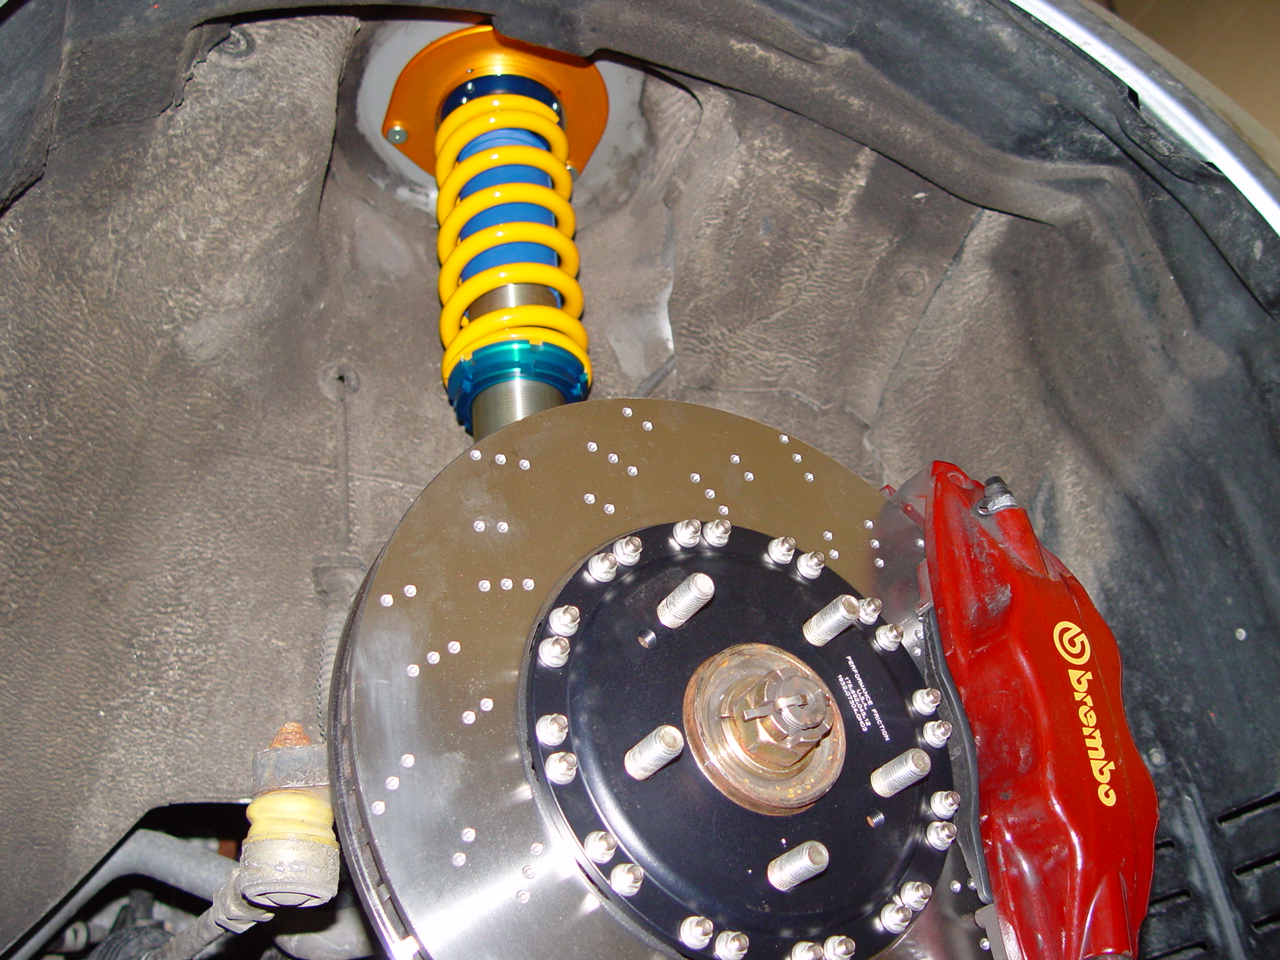
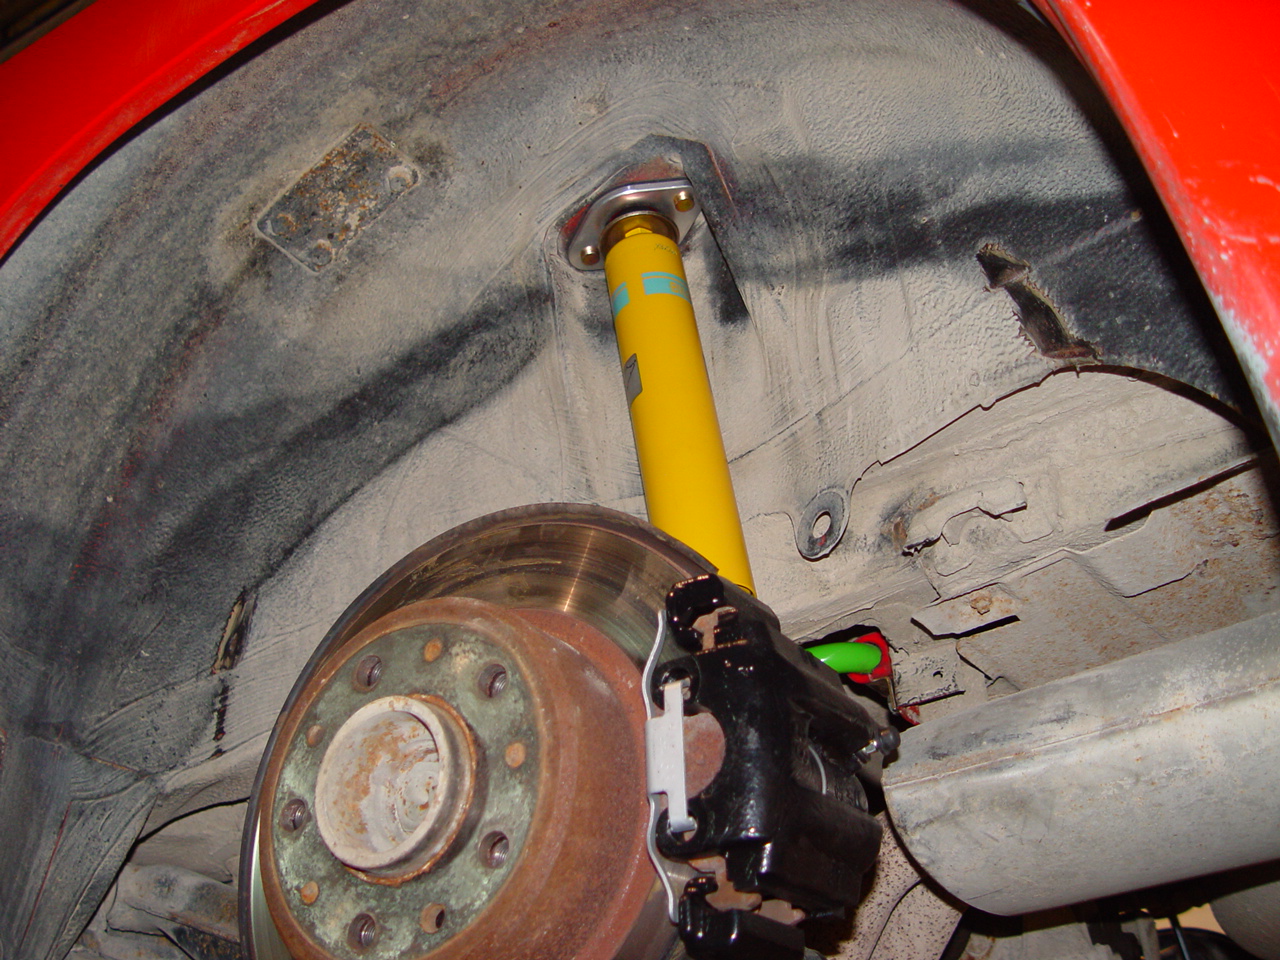
Here you can see all of the parts back on the car including the rebuilt brake calipers, new brake lines, brake cooling backing plate, new wheel bearings, new sway bars and sway bar links, lower control arms, lower control arm bushings, upper strut mounts (offset 30 mm for added camber), new dampers and custom reinforced axle carrier.

DSC00546.JPG