« March 2008 | Main | May 2008 »

April 28, 2008

Handling the Power (Si part 4)

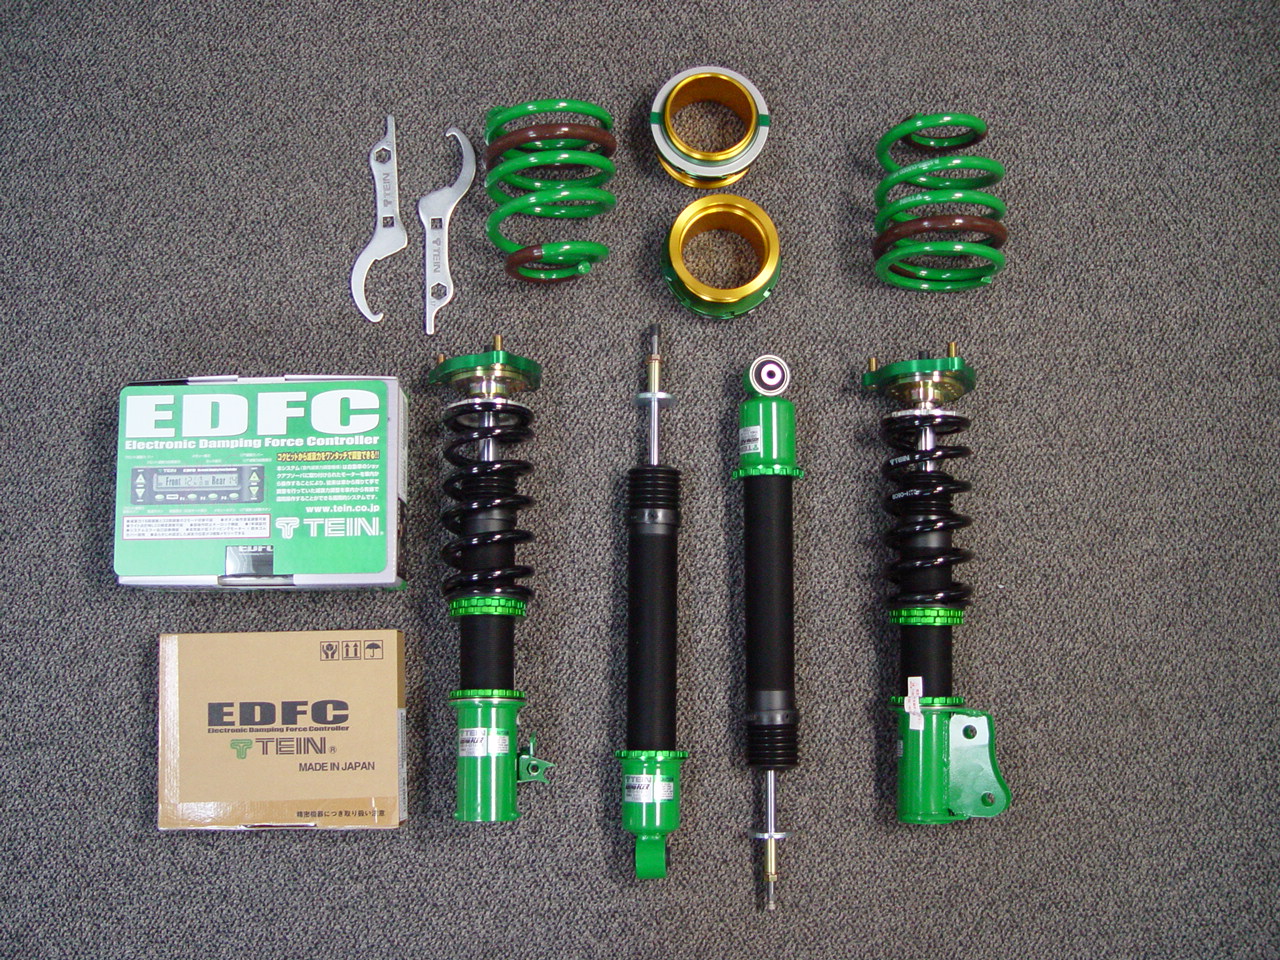
In the final installment (for now) of the Civic Si project we tackle the suspension. The suspension really is the most important aspect in the overall performance of the vehicle. All the power in the world doesn't help if you can't control it. You want the four tire's contact patches touching the ground in as balanced a fashion as possible, controlling the car's motion. A good suspension set-up works with the tires and the road to provide the best possible grip in all conditions when accelerating, cornering and braking. Its mission is to keep the wheels planted and the body stable. We specified the best TEIN kit available, the "Driving Spec Control Master Type Flex" coil over system with "Electronic Damping Force Controller" (EDFC).

We found the quality of the components to be very high. The kit came with everything required for the installation, including special lock-tite, tools and a very extensive installation manual (at least for the mechanical bits).

DSC00629.JPG

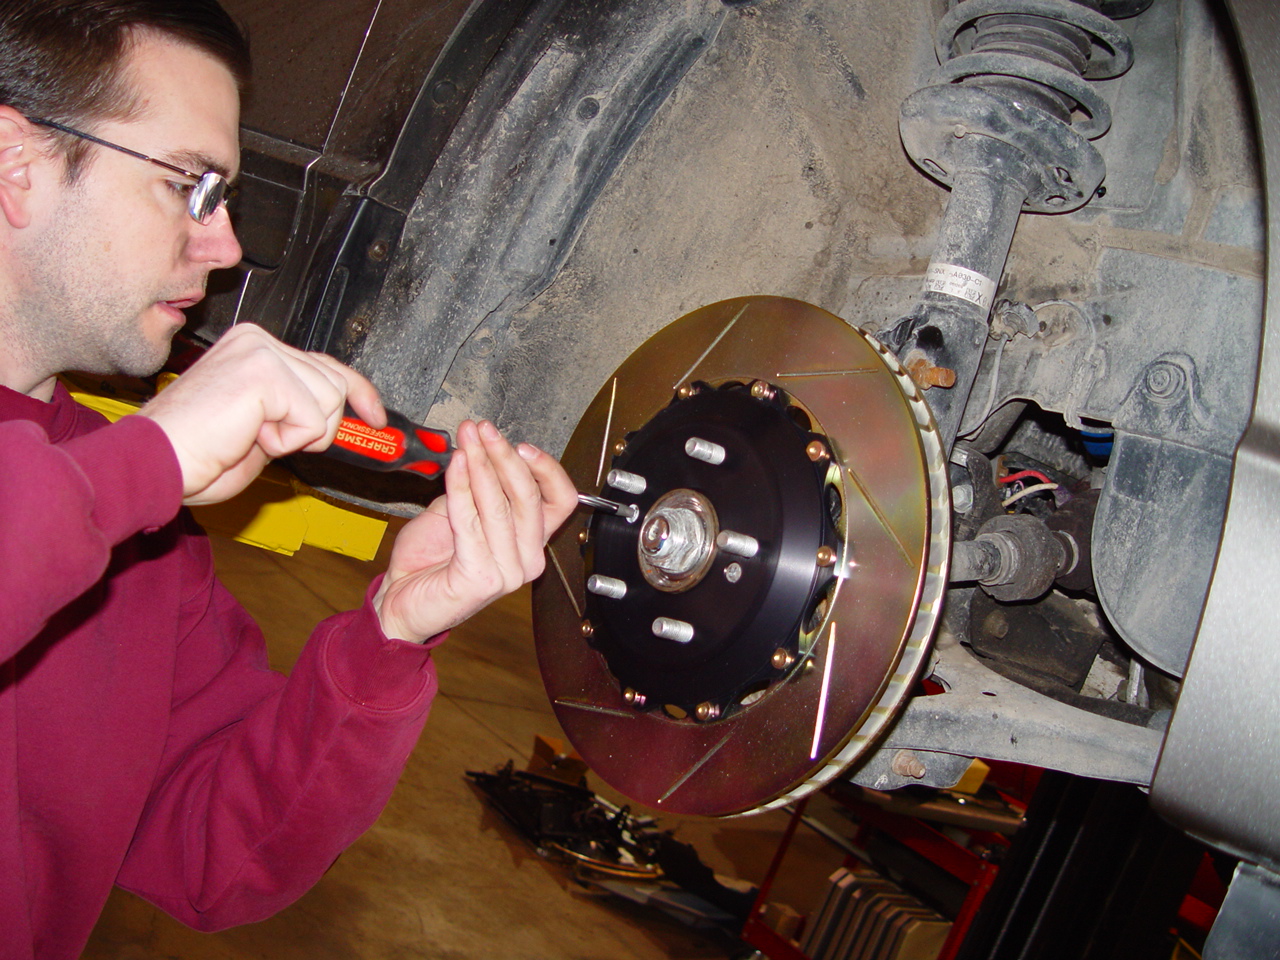
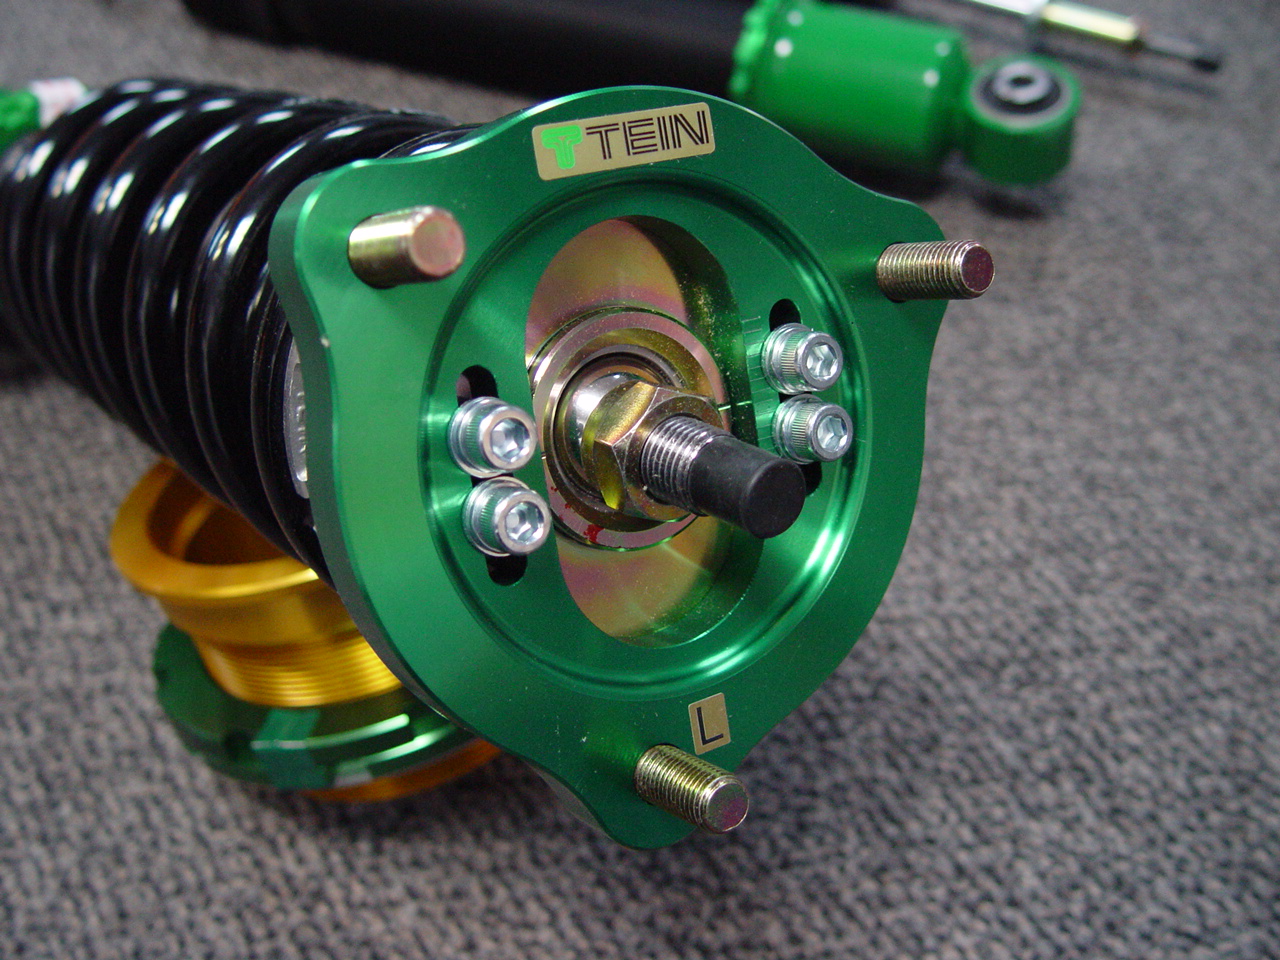
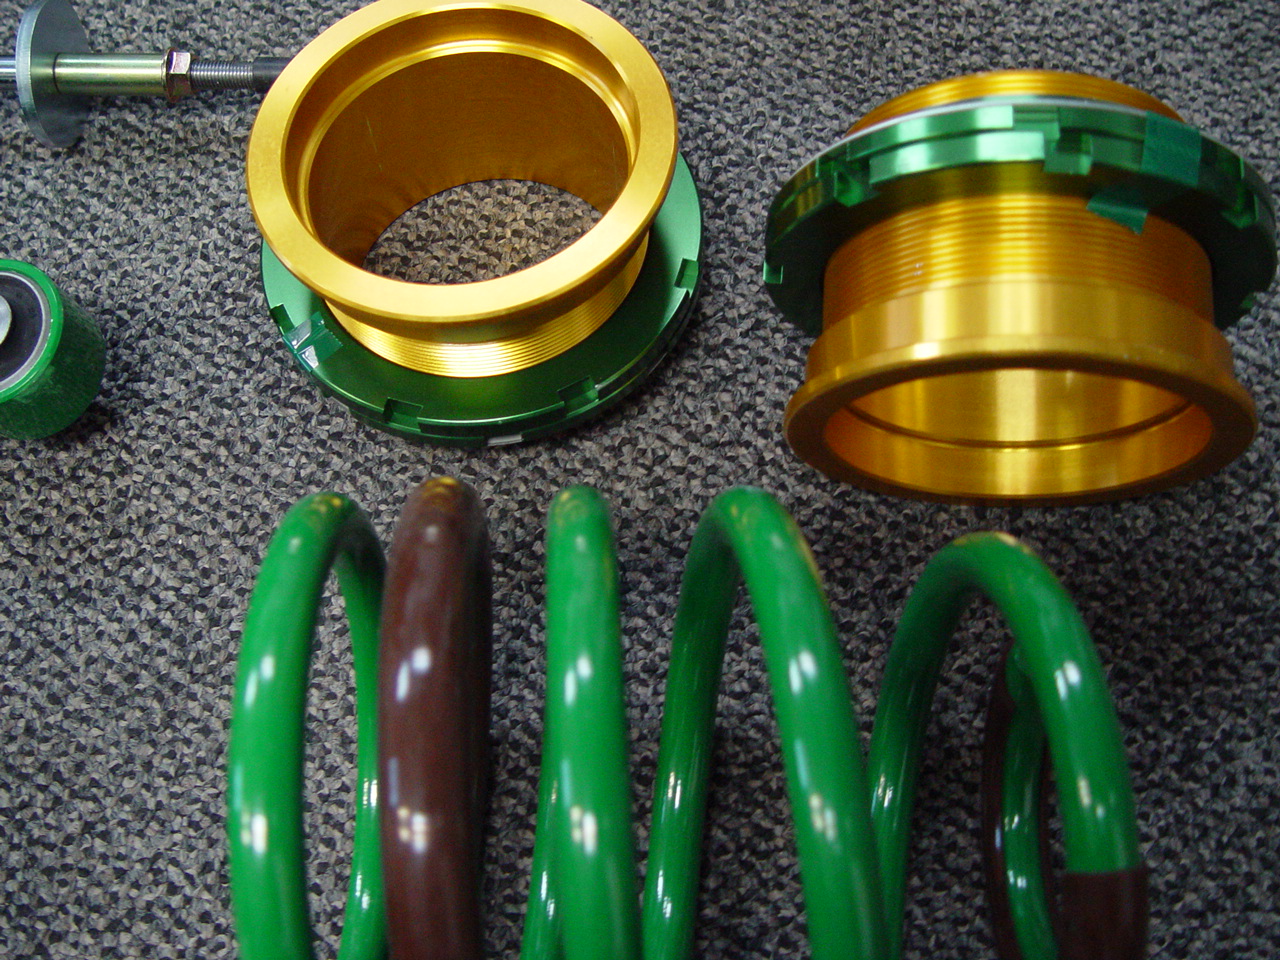
Here is a close up of the camber/caster plates-- once installed you'll never see them again thanks to the A pillar design of the new Civics.

DSC00632.JPG

This is a detailed look at the rear springs and height adjustable spring perches.

DSC00633.JPG

And finally, the EDFC that controls the damper rates.

DSC00638.JPG

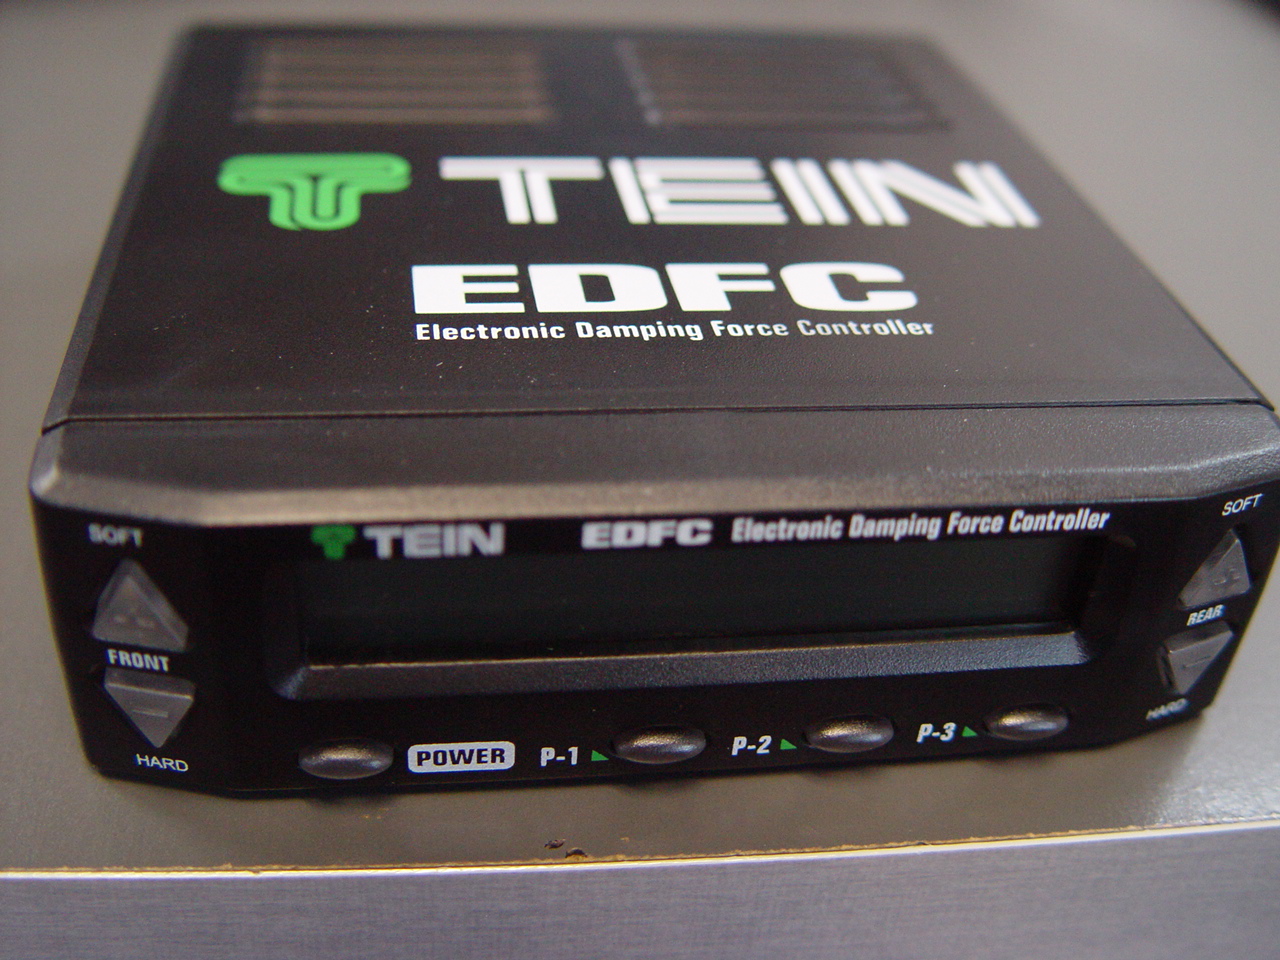
We went with the EDFC upgrade because of the shock tower access problems associated with the Civic's design. Utilizing electric servo motors attached to the tops of the damper, the owner can quickly and easily adjust the damper rates from inside the car. The only downside was that it added to the installation time (and cost) because TEIN did not provide any sort of clue as to how and where the cables were to be run.

Here is a shot of the front camber plate, coil-over and servo motor installed.

DSC00653.JPG

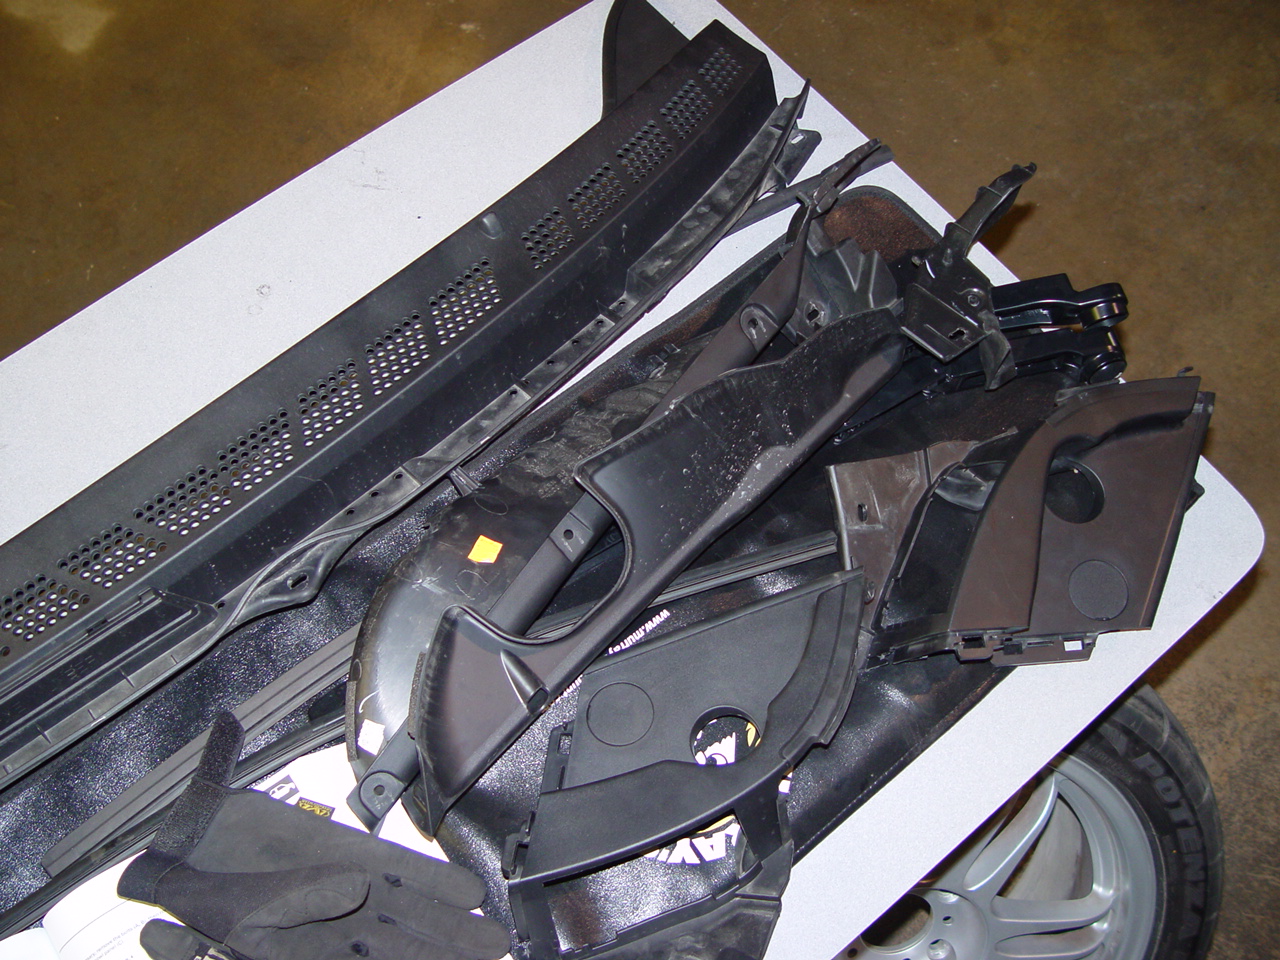
And this is what we had to disassemble to properly install the front components.

DSC00654.JPG

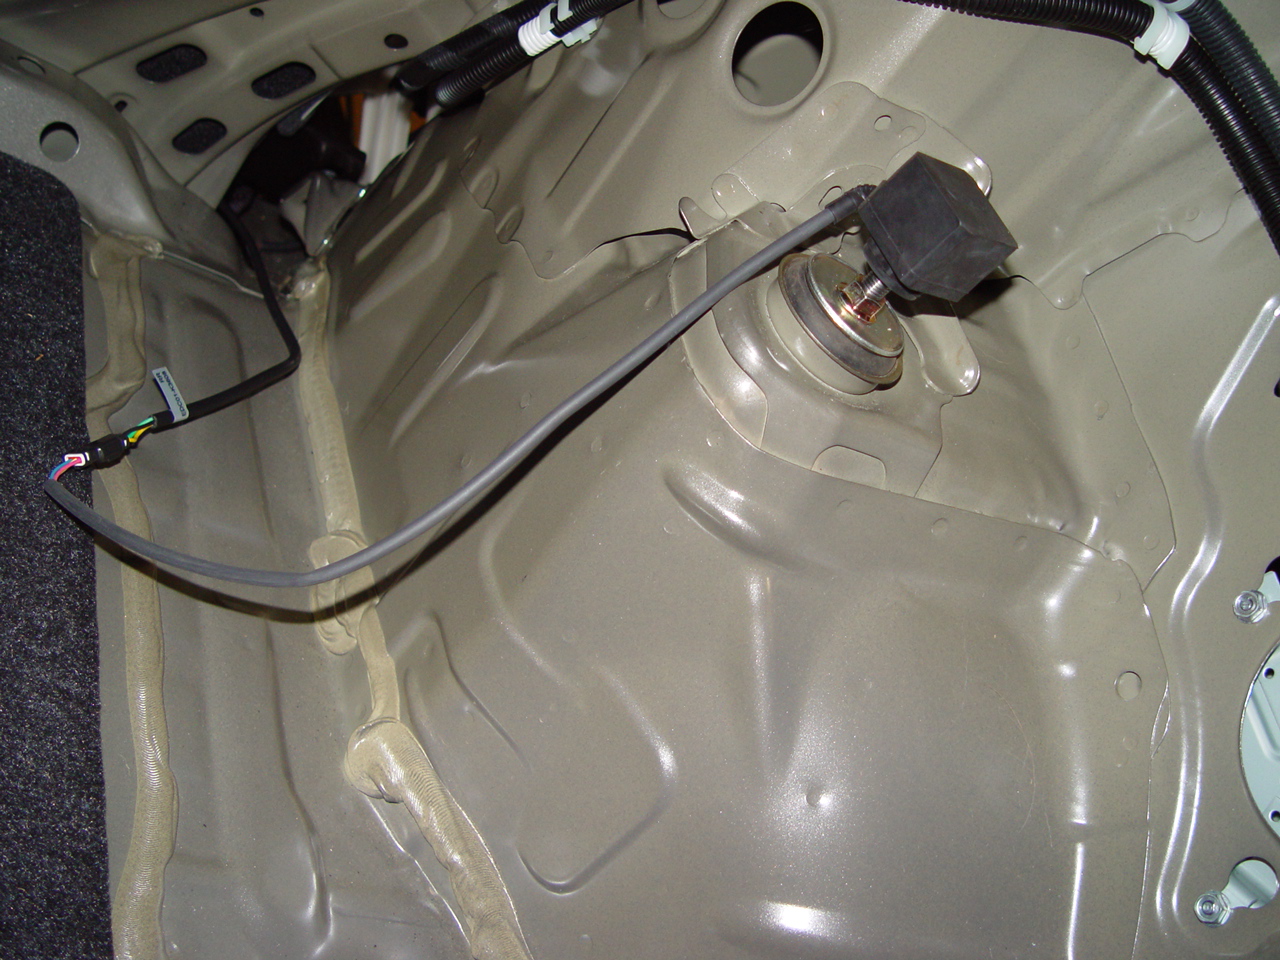
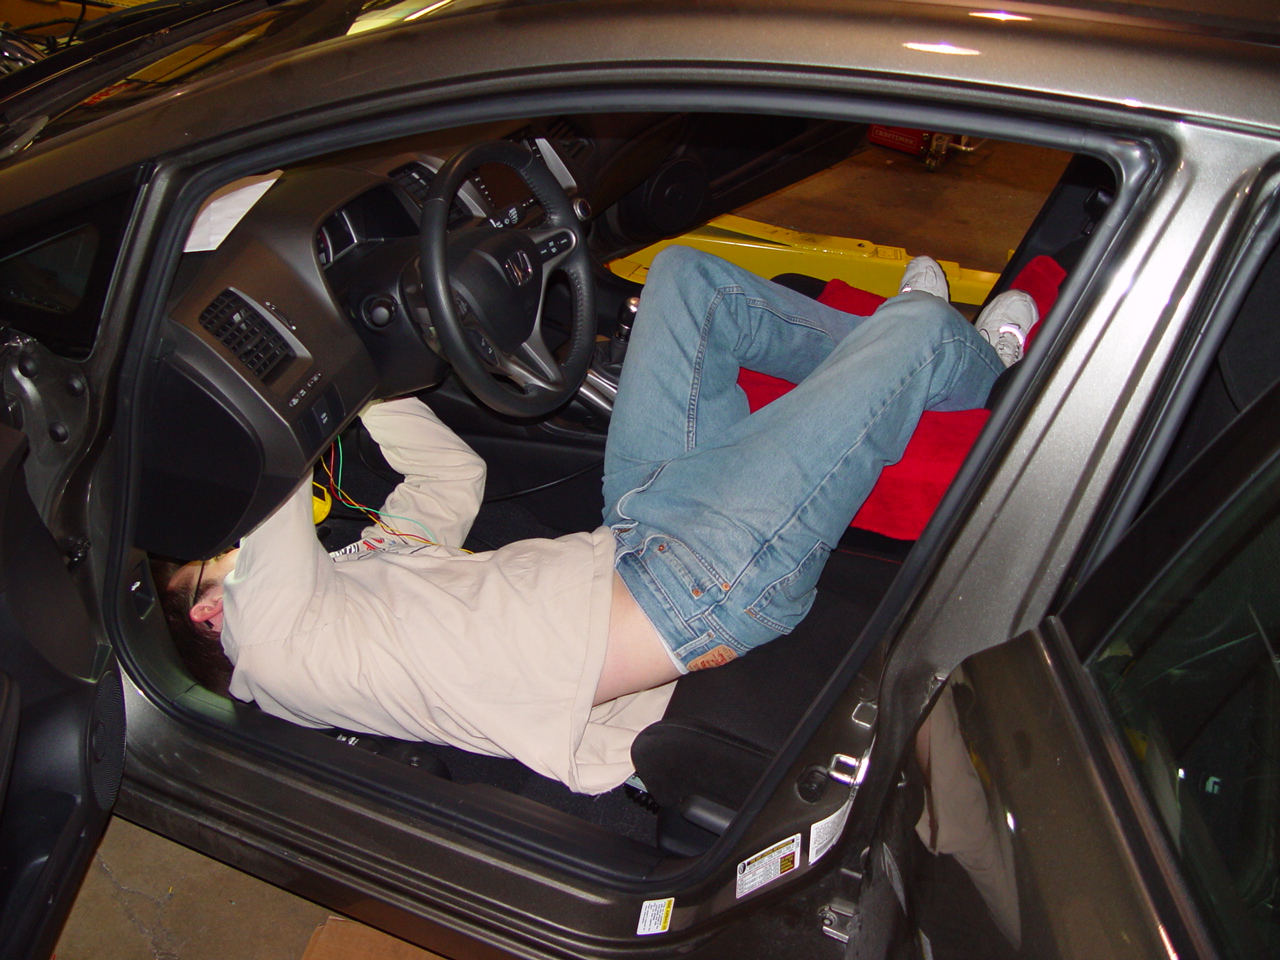
We also had to de-trim the trunk and interior to run the cables from each corner to the EDFC in the center console.

DSC00670.JPG

DSC00681.JPG

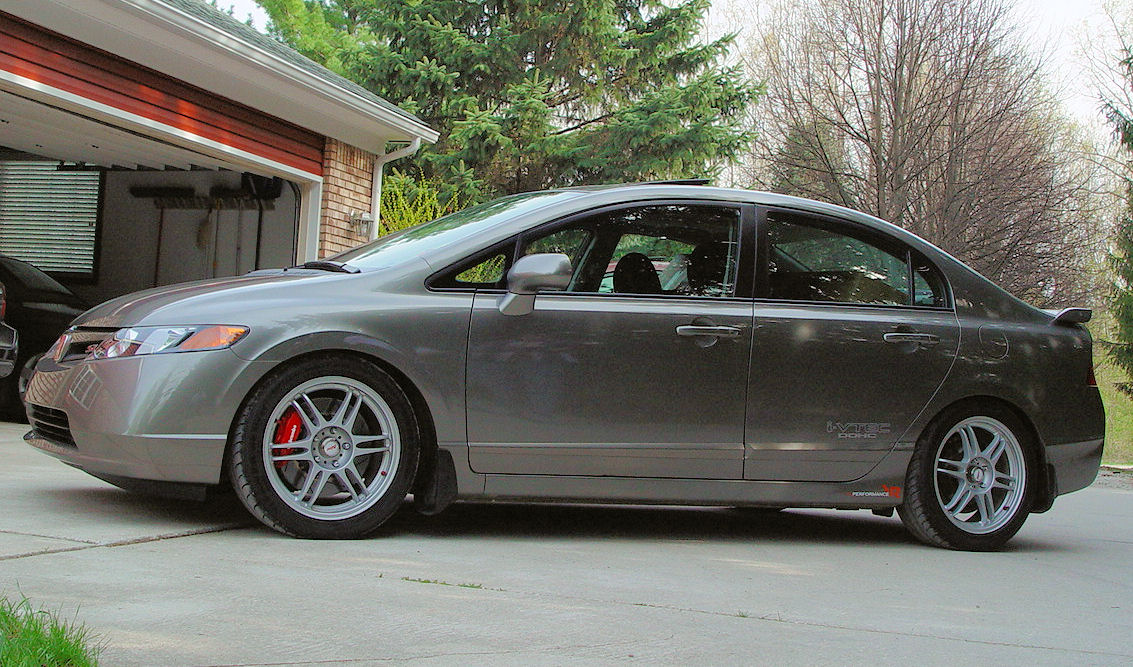
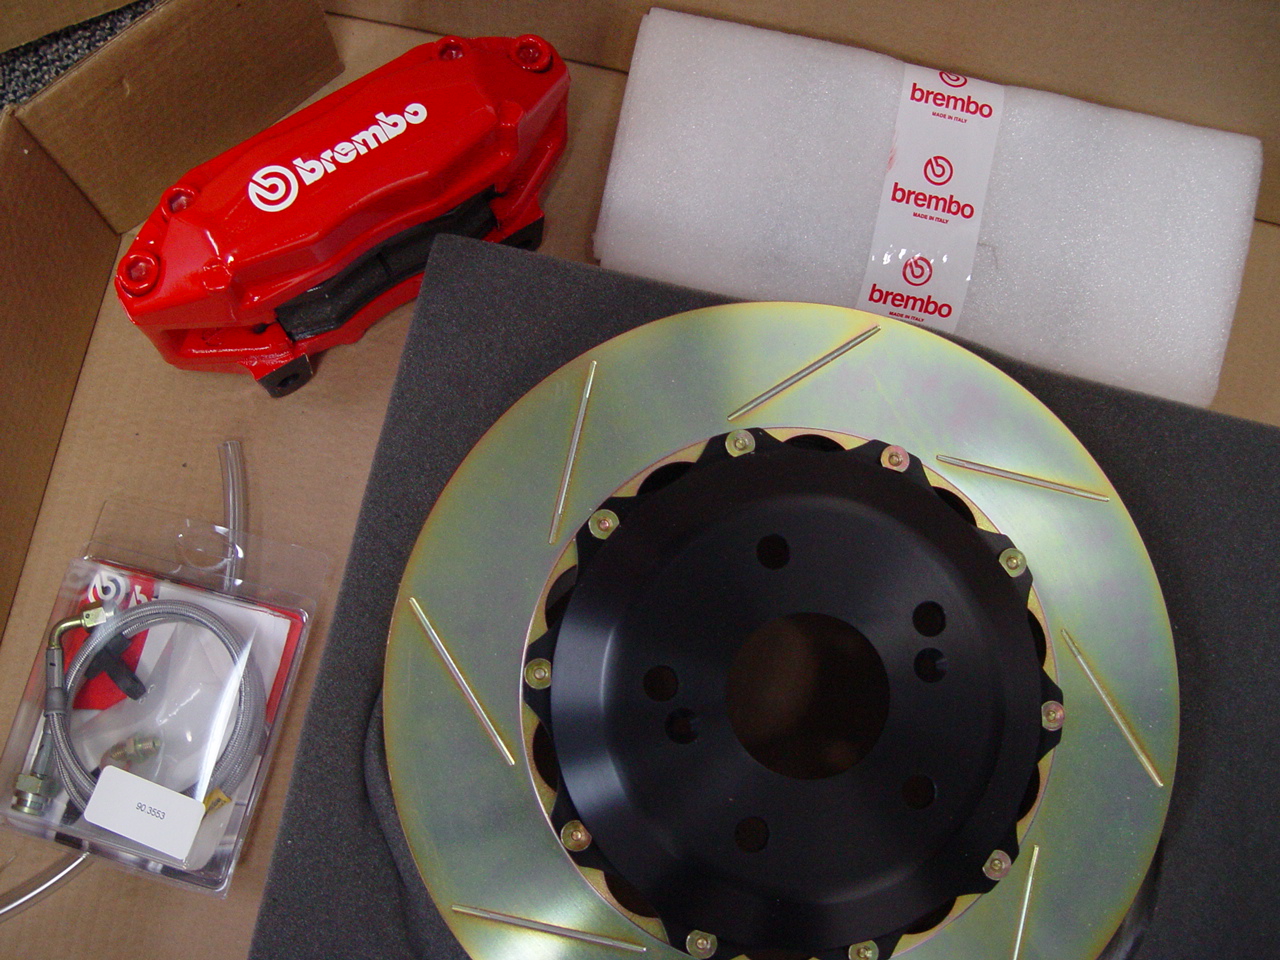
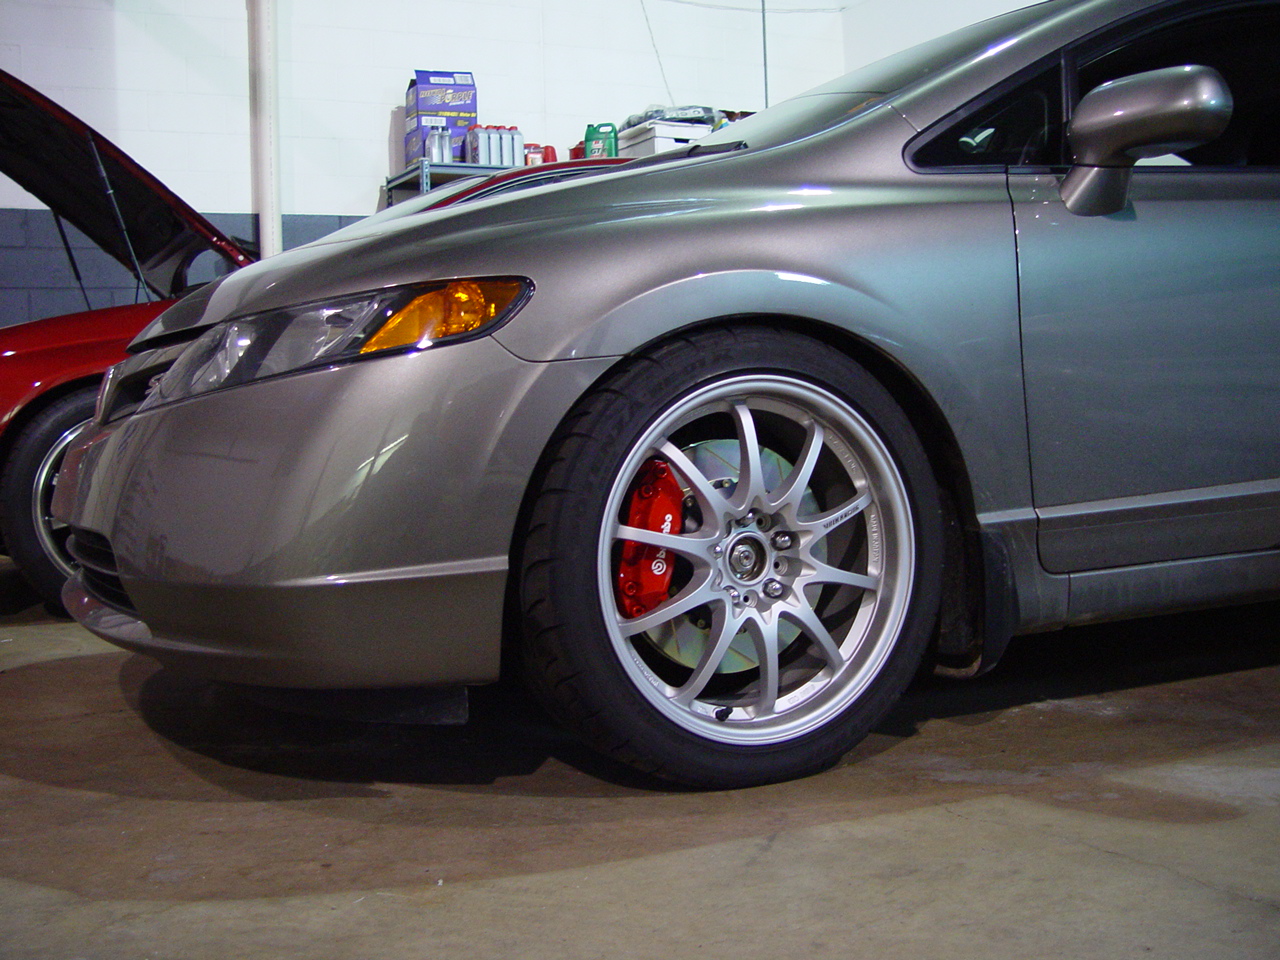
In the end, all the time and effort was worth it. This Si is now the class of the field with its new intake and exhaust, new Brembo brakes and TEIN suspension.

Here are the owner's first impressions:

One guy at a stoplight nearly got out of his car looking at us and stayed at the light momentarily as I took off to get a full view. It does look good -- especially since the effect comes from performance cues not just bling.

Anyway, the car feels like a better car. By that I mean a more expensive car. I read in a review once that the new STi and EVO are basically $20K cars with $20K of add-ons. It's true. So my Civic is commensurately improved and I would bet with comparable power it would give the STi and EVO a challenge. Even with 200hp it seems now like it can run in the corners with almost anything. We'll see.

As it stands now, with just some brief street experience, the Si feels more planted and secure. The steering feel is very centered and communicative - you can add lock back and forth just like race cars warming up tires with very little wobble or wiggle. Nice.

The ride is stiff but in a good way like you said. I drove about 50 miles total and set the EDFC memory at 0, 10, and 16. In straight ahead driving it doesn't seem to make much difference in the ride. The springs take a bit to compress. There is a thump-thump on rough roads but never jaw slapping.

The damper settings seem, however, to make a pretty big difference in roll while turning. The turn-in is better than ever and the neutral feel in a long sweeper is now less floaty and more precise. I can't wait to experiment on the track.

DSC00697a.jpg

DSC00696a.jpg

April 27, 2008

M3 Race Car Build

Lawyers want to argue in front of the Supreme Court, soap stars want to appear in a summer blockbuster and race car drivers want to win for Ferrari—every discipline has its ne plus ultra that those toiling in the trenches aspire to. For an automotive performance shop it is building race cars. Which makes sense, since a race car is the ultimate expression of the performance automobile and a real test (and testament) for its builder. You’re putting your ideas, engineering and craftsmanship up against others in an open competitive arena. What works and what doesn’t is immediately showcased for all to see. Here’s our first attempt at building a race car for the NASA GTS series.

The donor car was a 1996 BMW E36 M3— which was rode pretty hard and put away wet before it came to the shop. And while not a pristine car, it is a great inexpensive vehicle to convert into a race car. The E36 M3 is robust and has relative good power to weight ratio straight from the factory. The example here was already modified for track day use, including upgraded springs and sway bars and a bolt in cage. We quickly decided that these limited “upgrades” were unacceptable for a real race car, even if only at an amateur level.

The first order of business then was to strip the car down to it bare essentials.

DSC00514.JPG

Here you see the beginning of the dismantling of the interior. First we had to remove the bolt in cage and its floor plates. Then we took the seats, center consol, door panels, trim bits, kick panels, knee bolsters, airbags and carpeting out. This revealed all of the sound deadening material that was glued onto the sheet metal tub (the black patches). Several hours of scraping with a putty knife and a heat gun and we were able to remove all of the heavy rubberized material (30 lbs worth!)

DSC00520.JPG

With the trim panels all removed, we next tackled the electronics. The car originally came with a stereo (of course) with large rear speakers, CD changer and amplifier—all of which is not needed in a race car. Side windows, including their power motors, were also tossed as was the power sunroof. This left yards of cable and wiring which we traced and removed. (Along the way we discovered a Valentine One radar detector a previous owner installed under the rear window shelf.)

It took days of careful work to dismantle and strip the interior, but with an estimated weight savings of about 170 to 200 lbs, well worth the cost and effort.

DSC00527.JPG


At this point we had to decide what would go back in to the car, since everything we took out was essentially for a street car, very little was reused.

The next big step was to re-install the roll cage. For safety’s sake, and per NASA rules, we had the cage welded in (instead of bolted) and added some extra tubing at the back (see the big x-brace and straight side bars in the photo below).

DSC00577.JPG

A second door bar was added to the driver’s side with a linking tube to strengthen the individual bars.

DSC00578.JPG

So that the cage would not simply punch through the sheet metal floor, all of the anchoring plates were increased in size (to the maximum allowable per NASA rules) and boxed wherever possible. Here you see some pretty intricate fabricating and welding where the two back bars meet up with the rear shock tower base.

DSC00579.JPG

We worked with Dunn’s Welding, a local shop familiar to many area racers, to do all the cage work. And as you can see in the photos, they did an excellent job.

The car was then shipped straight to Automark for prep and paint. Sure we could have gone with a couple of spray cans and painted the bare metal, but we’re not inclined to do things half-assed at VRPerformance. Automark is the best local paint shop and we knew we could trust them to handle the rather difficult job of not only painting an interior, but one with a welded in roll cage. They also permanently affixed the steel sunroof into place by welding on brackets and filling the gap with high strength window sealant (sealant typical of early Ferrari windshields).

Here you can see lengths the painters had to go through to mask off the car. First they prepped and painted the roll cage.

Picture 015.jpg

Next they tackled the rest of the interior, including the floors.

Picture 018.jpg

This is a shot of the sunroof bracket being welded in (the upright bars are there simply to hold the panel in place during welding).

Picture 022.jpg

The sunroof installed and sealed.

Picture 020.jpg

Check back soon for the next installment, wherein we’ll describe the final car preparation before the first race weekend.

April 16, 2008

Combustion

The "Ultimate Driving Machine" tagline is over 30 years old now, and it's safe to say that even non-enthusiasts know exactly what carmaker belongs to that particular phrase. BMW's brand marketing consistency is equaled only by its product consistency. Okay, so that's just a bunch of fancy mumbo jumbo to introduce this latest ad, which we think is pretty cool. Watch it after the jump.


April 03, 2008

Stopping Power (Si part 3)

And the transformation of the Civic continues... One of the weak spots on the 2006+ Civic Si is the braking system-- perfectly adequate for street driving but toast on the track. Our balanced approach to all things automotive dictates that we look at the entire system as we make upgrades. We've already tweaked the suspension some, detailed here (and there's much more to come in this department, stay tuned) and upgraded the intake and exhaust system, detailed here. So now it's on to the brakes.

As already mentioned, the stock braking system on this Honda is not up to the challenge of track driving. The owner was able to make it work last year by doing some of the basic stuff: high temp brake fluid, better pads, slotted rotors. But now that we've already added a bit of muscle under the hood in the form of better breathing, stickier tires, and a complete suspension upgrade is currently in the works; the corners at the track will be coming a lot quicker and the car will need to scrub off much more speed.

We went with the Brembo four piston caliper and big 328mm by 28mm slotted rotor brake kit. Brembo is the biggest high performance brake manufacturer and has a long standing track record of top quality engineering and manufacturing-- so the choice was easy.

We prefer slotted over cross drilled for their durability at the track. Cross drilled rotors are great for highway cruising in the rain-- which is what they were designed for in the first place. Slotted rotors still help to evacuate the gases that can build up between the pads and the rotors when braking, but the basic integrity of the rotor is not compromised with a bunch of little holes.

Here's the kit as it arrived:

DSC00534.JPG

Modern brake components are pretty simple to swap out if you follow good mechanic's habits. It is really important to know the proper torques for the various bolt sizes and materials. The brake components are not only put under a great deal of torque stress, extreme heat cycling is a major issue. An over tightened bolt will fail, end of story.

DSC00537.JPG

One thing to note about installing big brake kits on your car-- more often than not the stock wheels will no longer fit. Bigger brakes require more caliper spacing-- the space between the "spokes" of your wheel and the caliper. Stock wheels are often very tight against the caliper and allow very little room for larger set-ups. In a pinch spacers can be used if the rotor diameter fits inside the wheel diameter and all you need is more space for the caliper-- be we do not recommend going more the 7 mm.

DSC00539.JPG